What can we help you with?
Conducting a video-based search interview
Scheduling the interview meeting
Personal/Standard Meeting
Using the Outlook Client
- Open Outlook -> Open your calendar
- [Windows] Click “New Teams Meeting.”
[Mac] Click “Meeting.” Then in the ribbon click “Teams Meeting.” - Enter a title.
- Enter the email addresses of all attendees. (these can include non-Wooster (guest) emails)
- Pick a start time.
- Pick an end time.
- Click “Send.”
Using Outlook Web App
- Open https://outlook.office365.com
- Click the Calendar icon in the bottom left to open your calendar.
- Click “New Event.”
- Enter a title.
- Enter the email addresses of all attendees. (these can include non-Wooster (guest) emails)
- Choose a date, start, and end time.
- Click the drop down “Add online meeting” and choose “Teams Meeting.”
- Enter any descriptions necessary, attach necessary documents.
- Click “Send.”
Using the Microsoft Teams Client
- Open Microsoft Teams-> Click the Calendar tab
- Click “New meeting.”
- Enter a title.
- Enter the email addresses of all attendees. (these can include non-Wooster (guest) emails)
- Pick a start time.
- Pick an end time.
- Enter details for the meeting.
- Click “Send.“
The above options create a Personal meeting. Such a meeting is not associated with a team in Microsoft Teams. However, the meeting chat will display in the Chat tab of the Microsoft Teams client.
What to expect
- All meeting participants will receive a calendar invite with a link to the online meeting.
- Participants are encouraged to have Microsoft Teams installed.
- The installer can be found at https://teams.microsoft.com/downloads.
- The Teams app is available on mobile for Android or iOS devices.
- The Teams app is recommended, though participants can join from a web browser on Windows or Mac using Microsoft Edge or Google Chrome.
- If the guest participant installs the Teams app from the link in the meeting invite, they will not need to create a Microsoft account and will be able to enter their name and join the meeting.
- All participants should have access to chat and the ability to present.
- Attendees joining the meeting using a non-Wooster email will be placed in the Lobby until a Wooster participant lets them into the meeting, unless the meeting organizer modifies the meeting options to allow Guests to Bypass the Lobby.
Channel Meeting
Using the Microsoft Teams Client
- Open Microsoft Teams-> Click the Calendar tab
- Click “New meeting.”
- Enter a title.
- Enter the email addresses of all participants. (these can include non-Wooster (guest) emails)
- Pick a start time.
- Pick an end time.
- Pick a channel (when you put your cursor in the “Add channel” field, a list of your teams is displayed and you can select a channel from the appropriate team).
- Enter details for the meeting
- Click “Send.“
This will schedule a meeting in the specified channel of the team you selected.
What to expect
- All meeting participants will receive a calendar invite with a link to the online meeting.
- Participants are encouraged to have Microsoft Teams installed.
- The installer can be found at https://teams.microsoft.com/downloads.
- The Teams app is available on mobile for Android or iOS devices.
- The Teams app is recommended, though participants can join from a web browser on Windows or Mac using Microsoft Edge or Google Chrome.
- If the guest participant installs the Teams app from the link in the meeting invite, they will not need to create a Microsoft account and will be able to enter their name and join the meeting.
- If users are not members of the team in which the channel meeting was scheduled, they will not be able to access chat.
- Attendees joining the meeting using a non-Wooster email will be placed in the Lobby until a Wooster participant lets them into the meeting, unless the meeting organizer modifies the meeting options to allow Guests to Bypass the Lobby.
Information for the candidate
Am I required to use the Teams app?
You can join a Teams meeting with the Teams app or through a supported browser.
- You do not need a Microsoft account to join a Teams meeting in the browser.
- To join in the Teams app, you must login to Teams with a Microsoft account.
Joining from a calendar invite or link
- If you received a calendar invite with the appropriate link to join the Microsoft Teams meeting, click the Join Microsoft Teams Meeting link.
- If you received a link (in an email, from a website, etc.), click the link.
- For more information, visit this Join a Meeting in Teams Microsoft support page.
Join with the Microsoft Teams app
- If you do not have Microsoft Teams already installed, please follow the Directions for Installing Microsoft Teams.
- After the Microsoft Teams app launches, click the “Join” button, enter your name, and you will be placed into the meeting lobby. The moderator will bring you into the meeting at the appropriate time.
Join with a Browser
- Click the join link or copy the link from the calendar invite and paste into the address bar of your browser.
- Compatible browsers are Microsoft Edge, Google Chrome, Firefox, and Safari
- Browsers on mobile devices are not supported.
- When the web page opens, just click “Join on the web instead.”
- A popup will appear asking you to allow your browser access to your microphone and camera, click “Allow.”
- You will be asked to join the meeting. Enter your name and click “Join now.”
- You will be placed into the meeting lobby and the moderator will bring you into the meeting at the appropriate time.
Troubleshooting When You Are in the Meeting
- If the Wooster participants cannot see your video, click the camera on the tool ribbon to activate your video.
- If the Wooster participants cannot hear you, click the microphone on the tool ribbon and verify that your preferred microphone is selected.
- If you cannot hear Wooster’s participants, please verify that your speakers are turned up.
Mac – Install Teams by Using the PKG File
- From https://teams.microsoft.com/downloads, click “Download” at the top of the page and the operating system specific version will download. For Mac clients a PKG file will download.
- Double click the PKG file.
- Follow the installation wizard to complete the installation.
- Teams will be installed to /Applications folder. It is a machine-wide installation.
Windows – Install Teams from an Executable Download
- From https://teams.microsoft.com/downloads, click “Download” at the top of the page and the operating system specific version will download. For Windows clients an executable file will download.
- Click “Save file” to download the file.
- Open your Downloads folder and double click the “Teams_Windows_x64” file.
Getting to know the toolbar within Teams
Toolbar
Participant Tool
This allows you to see participants and add people to the meeting. Organizers can manage permissions and take attendance in the more actions sections.
Chat Tool
Allows you to send text-based messages and ask questions while others present or communicate. You also have the options to attach files or send an emoji.
Raise Hand Tool
This allows you to show you have a question without disrupting the whole presentation. To raise your hand, simply click on the icon; click the icon to lower it once your question has been answered.
More Actions
This provides access to Device settings, Meeting notes, Meeting details, how your meeting is viewed, change your background, Turn on live captions, Start recording, provide a dial pad to call phone numbers directly and even turn off incoming video.
Camera Control
Click to turn your camera on and off.
Microphone Control
Click to turn your microphone on and off.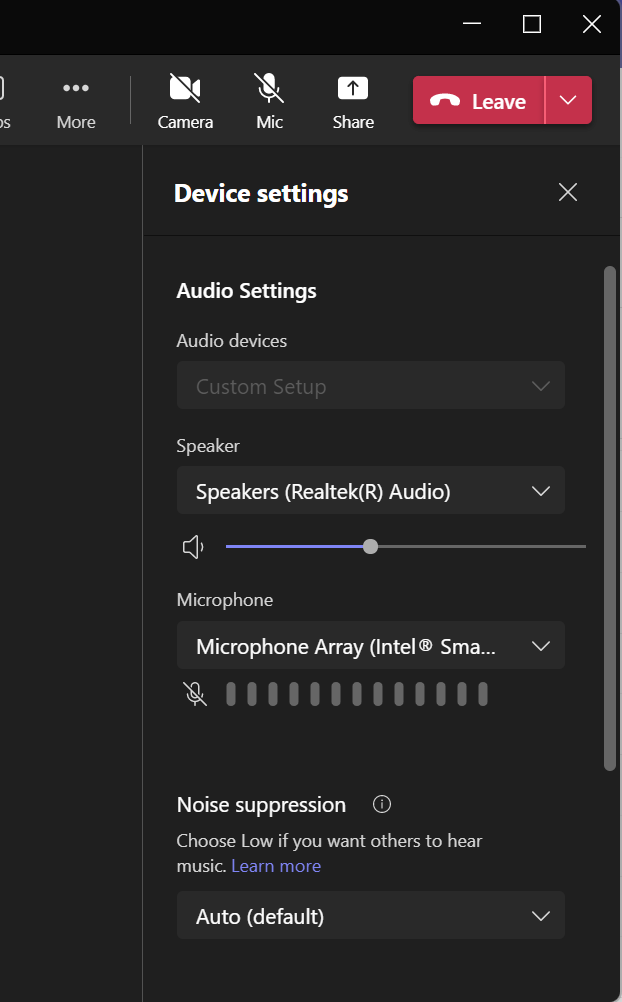
Share Content
This allows you to share your Desktop, a Window, PowerPoint, Browse to share other files, or the Whiteboard.
Click on the item you want to share in the meeting.
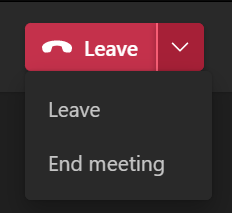
Leave
Simple click Leave when you would like to leave a meeting that is still in progress.
Leave Dropdown Menu
The meeting organizer has the options to leave the meeting or end the meeting for all participants.