
What can we help you with?
Connecting Chromecast to Network
Connecting Chromecast to College of Wooster Wi-Fi network
Getting Chromecast application
If you do not already have the Google Home application on your mobile device, please download it from your App/Play Store.
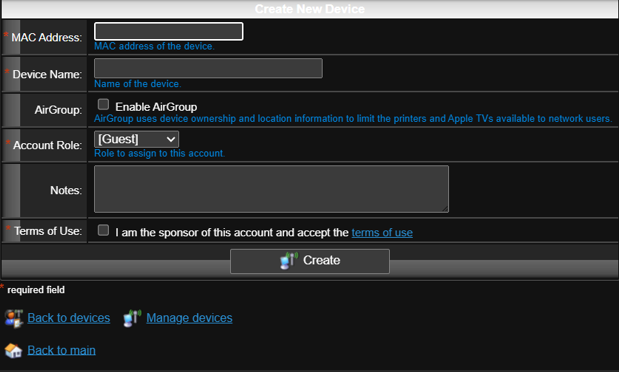
Register the MAC address of your Chromecast
- Visit Clearpass Device Creation.
- Locate and enter the MAC address of the Chromecast. To connect your device to the campus network you must locate its MAC Address (example: 00-1A-B2-34-56-CD). If you don’t know how to find the MAC address of your device, go to Google and type in “find the MAC address of my (insert device type here)”.
- Enabling AirPlay may help your device connect.
- Leave the Account Role as “Guest”.
- Check the box for “Terms of Use” and select “Create”.
Connect Chromecast to HDMI
- Connect your mobile device to The College of Wooster Wi-Fi
- Plug in your Chromecast and set it up correctly (Set up Chromecast with Google TV and Voice Remote or Set up your Chromecast device 3rd gen or older)
- Open up the Chromecast app on your machine
Connect to the Chromecast wireless network
- When the Chromecast application starts, it will search for the Wi-Fi network, “Chromecast_XXXX”.
- These X’s will correspond to a number displayed on your television screen. Select your Chromecast’s set of numbers and continue.
- Select Setup on your Chromecast app.
- Verify your 4-digit code.
- The Chromecast will prompt you to connect to a network.
- From the dropdown menu, choose “Select other Network”.
- Enter in the following credentials into your new entry boxes:
- Network: Chromecast (uppercase “C”)
- Security: WPA2
- Password: chromecast (lowercase “c”)
Migrate back to the College of Wooster wireless network
- Once your Chromecast says that it has connected, manually re-connect your computer to the College of Wooster Network via two preferred methods.
- System Preferences -> Network -> Choose Network -> “College of Wooster”
- Click the Wi-Fi option on the top bar of the screen and select “College of Wooster”
- The Google Home app should register this change and then display “Ready to Cast!”