What can we help you with?
Outlook Scheduling Poll
Introducing Outlook’s Scheduling Poll Feature
Microsoft Outlook has unveiled a powerful new tool to simplify the process of setting up meetings: the Scheduling Poll feature. This innovative addition allows Outlook users to effortlessly create voting polls to determine the most suitable meeting time for all participants, eliminating the back-and-forth of endless email chains and ensuring optimal scheduling efficiency.
You can view the entire video for details [or use video timestamps in the parentheses below].
For more information refer to Microsoft’s Create a Scheduling Poll support page.
If you would prefer to create a Bookings page that syncs with your Outlook calendar and your specified meeting preferences where others can schedule appointments per mutual calendar availability, see our Microsoft Outlook Bookings with Me article.
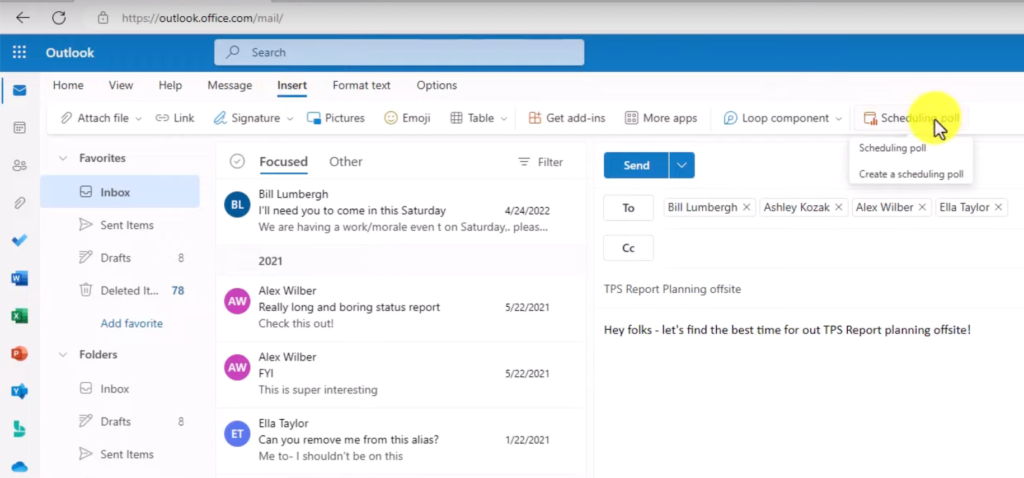
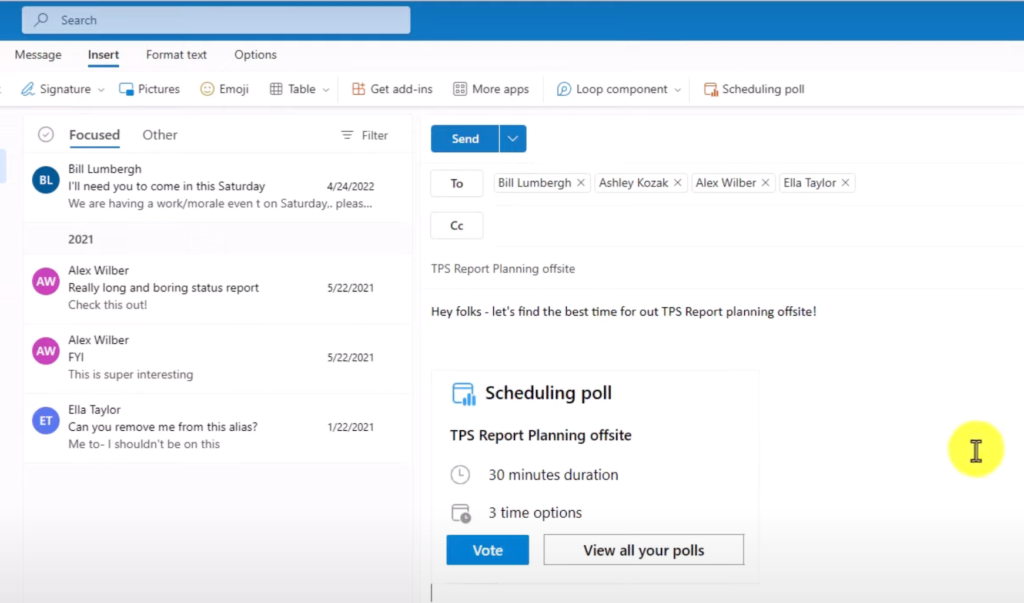
How to Access the Feature [0:12 – 0:39]
Accessing the Scheduling Poll feature is straightforward. Users simply navigate to the “Insert” tab and select “Scheduling Poll.” This action triggers the system to analyze the availability of all invitees based on their email calendars, providing a selection of the best available times for the meeting.
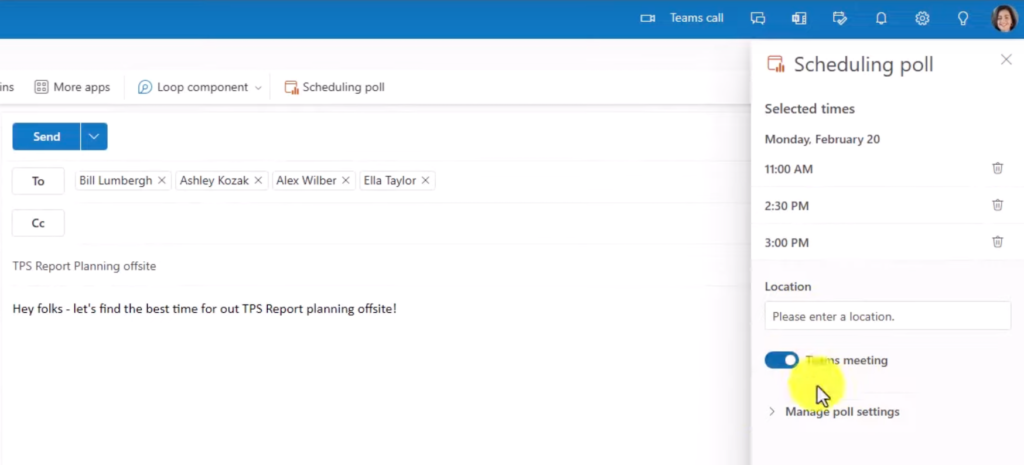
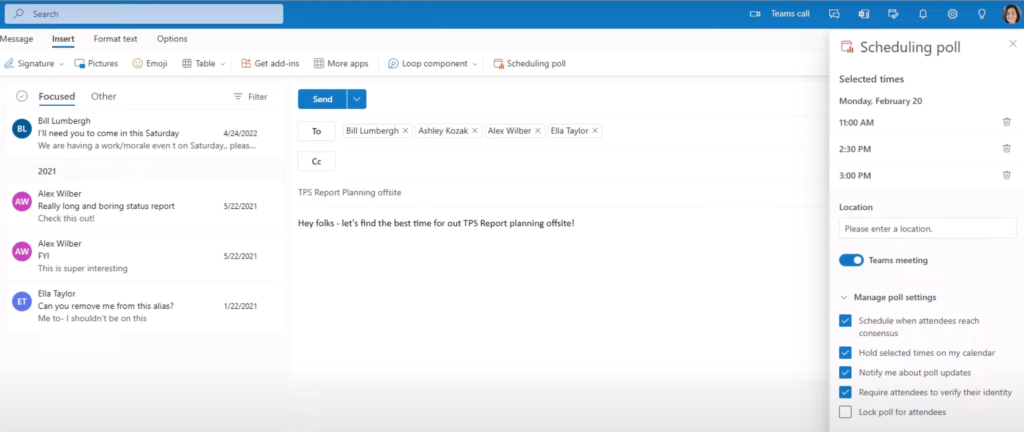
Customizing Poll Details [0:40 – 1:28]
Once the available times are presented, users have the flexibility to select their preferred options. After making their choices, they proceed to the next step, where they can specify the meeting location and manage poll settings according to their preferences.
Creating and Sending the Poll [1:29 – 1:50]
With the details finalized, users click “Create Poll,” and the system seamlessly integrates the poll into the email they are composing. It’s crucial to note that the poll automatically includes the recipients of the email, as it relies on their email addresses to gather availability data.
From the Invitee’s Perspective [1:50 – 2:25]
Recipients of the email containing the poll are presented with a straightforward interface displaying the various time preferences. Each option allows them to express their preference with choices like “prefer,” “yes,” or “no.” After selecting, invitees click “Vote” to submit their response.
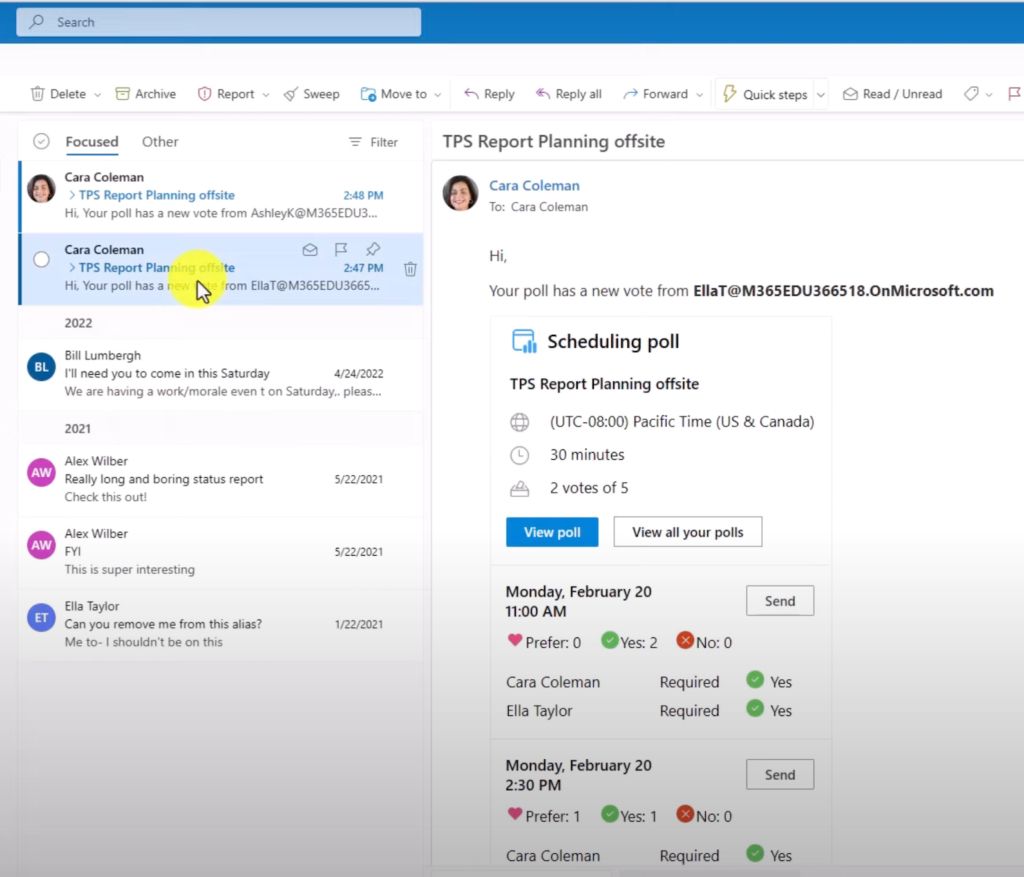
Managing Responses and Viewing Results [2:30 ]
Once the poll is sent out, users receive notifications via email as participants respond. These notifications provide a summary of the poll results, detailing who chose which times and the corresponding preferences. Users can also delve deeper into the results by clicking “View Poll,” where they gain access to a comprehensive overview of the responses, including the times chosen and the individuals behind each selection.