
What can we help you with?
WordPress (Blogs) for Classroom and Personal use
The College hosts a WordPress multi-site called Voices where faculty and students can create accounts and sites.
Creating a Voices Account and a Site
You have two choices:
- “Synced” account (Not recommended for students) Use your College username and password (your Voices password will change when your College Office 365/Outlook email password changes). Your posts will be associated with your username and be discoverable on Google.
- “Local” account (Not recommended for Faculty) Create a separate Voices account so that your username and password are not connected to your College credentials (and your password doesn’t change). Your username does not have to have any association with your name, which allows some anonymity from your writing be associated with you on Google.
To use your College username and password for your Voices account and create a site
- Go to https://voices.wooster.edu/
- Click the “Log In” link in the upper left corner on the toolbar.
- Login with your College username and password. Your Voices account is synced with your Wooster credentials and your password will change when your Wooster Office 365/Outlook password changes.
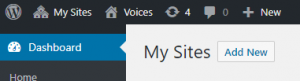
- In the upper left corner, click “My Sites.”
- Click the “Add New” button.
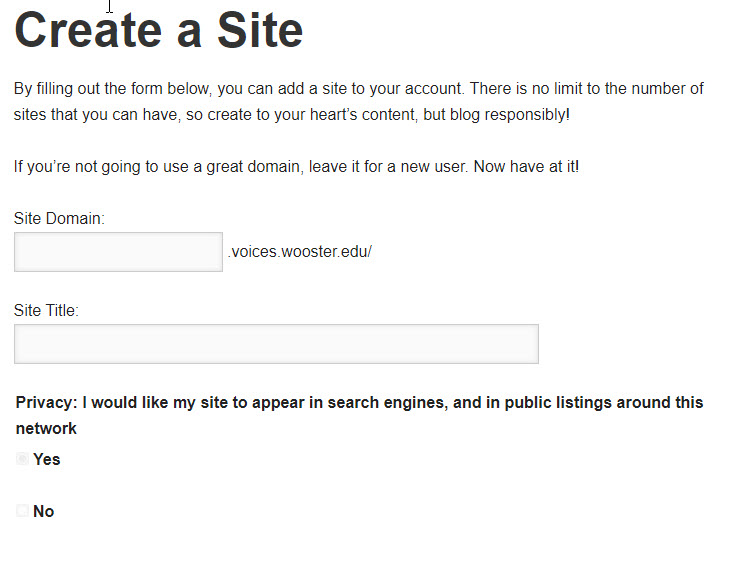
- Enter information for the following fields:
- Site Domain: The text you type in this box will be the Site URL followed by “voices.wooster.edu” to act as the web address for your site. For example, if “mycourse” were typed into this box, the address for your site would be https://mycourse.voices.wooster.edu.
- Site Title: This is the name of your site and will be displayed at the top of your site pages. It can be changed later along with a tagline.
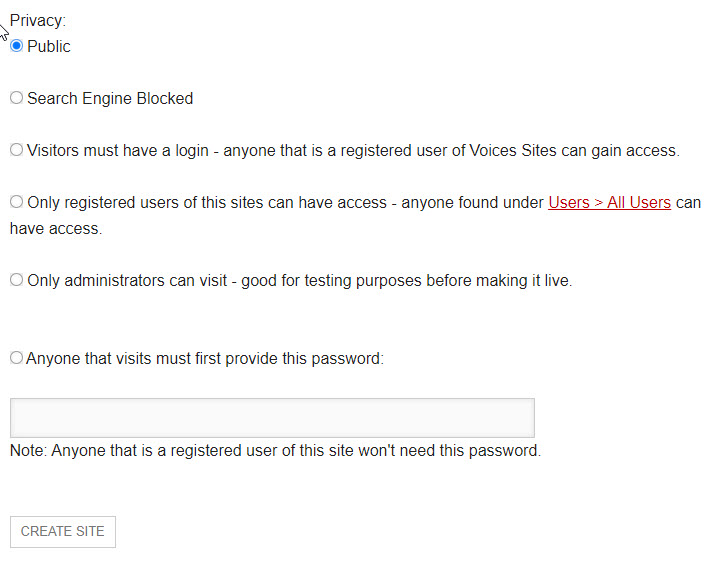
- Privacy: I would like my site to appear in search engines, and in public listings around this site: It’s a good idea to have search engines index your site. This helps protect you by archiving your work in case a severe issue with your site occurs. If privacy is a must, then check “No.”
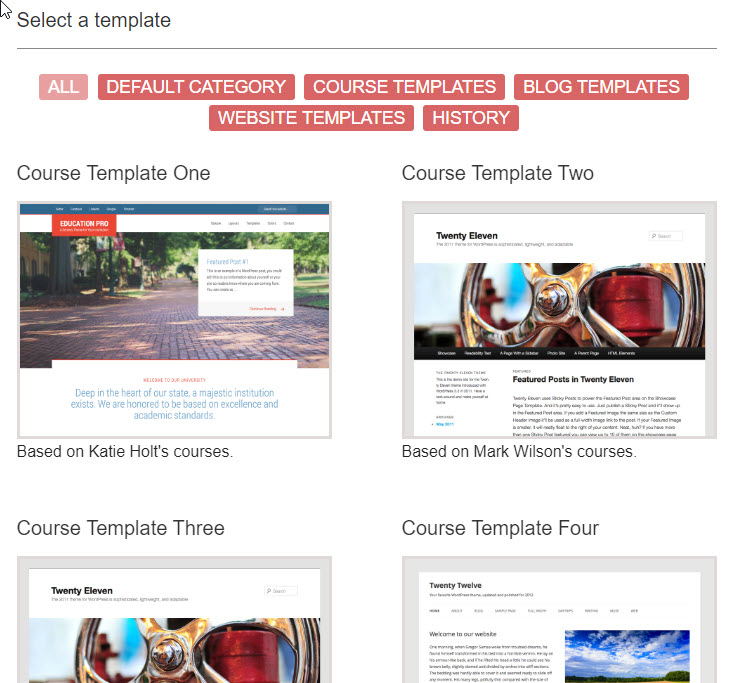
- Select a template: If you are creating a course site, consider selecting a Course template. If you plan to import a course, choose the template the old site used.
- Once you have completed these steps, click the “Create Site” button.
To create a “local” Voices account and a blog
- Go to https://voices.wooster.edu/
- Click the “Register” link in the upper left corner on the toolbar.
- Fill in the following information:
- Username: This will be your username for the voices.wooster.edu blogging site. It does not need to be the same as your Wooster username.
- Email Address: This must be an @wooster.edu email address
- Password: This will be your password for the voices.wooster.edu blogging site. It will not sync with your Wooster password and will not change when you change your Wooster password.
- Name: Your Name (this technically does not need to be your full or legal name)
- Dept/Major: These are optional
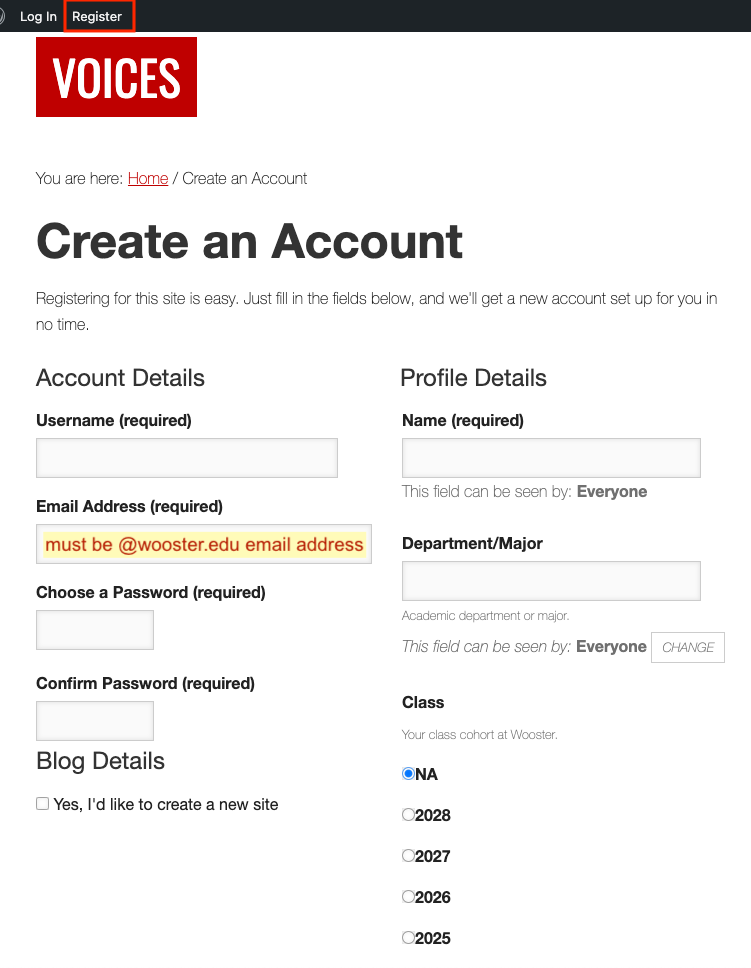
- Yes I’d like to create a new blog: Select this button if you would like a blog (Refer to images above).
- Site Domain: The text you type in this box will be the Site URL followed by “voices.wooster.edu” to act as the web address for your site. For example, if “mycourse” were typed into this box, the address for your site would be https://mycourse.voices.wooster.edu/.
- Site Title: This is the name of your site and will be displayed at the top of your site pages. It can be changed later along with a tagline.
- Privacy: I would like my site to appear in search engines, and in public listings around this site: It’s a good idea to have search engines index your site. This helps protect you by archiving your work in case a severe issue with your site occurs. If privacy is a must, then check “No”.
- Select a template: If you are creating a course site, consider selecting a Course template. If you plan to import a course, choose the same template as the old site.
- Once you have completed these steps, click “Complete Sign Up.”
- An email will be sent to your Wooster email account with a link to activate your Voices account. Follow the link and then click “Log In” from the navigation bar at the top of the screen or use the login widget in the right sidebar.
Navigation Bar
You’ll see a navigation bar at the top of your browser window that will provide you with quick and easy access to all the most important pages of your blog and its dashboard, along with important pages for the voices.wooster.edu site.

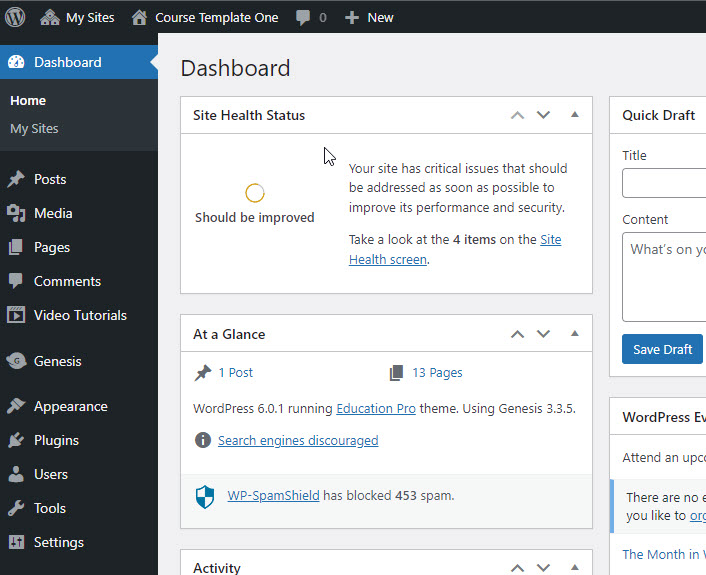
Dashboard
The Dashboard is your blog’s home screen that contains menus for managing your site and adding new content.
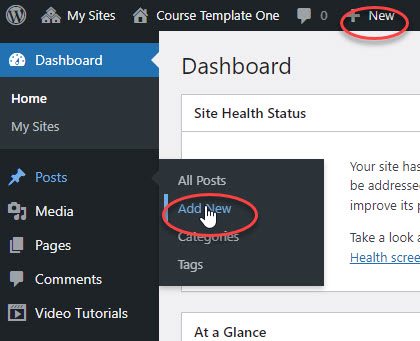
Adding a New Post
From your Dashboard, hover over the “Posts” menu in the sidebar and choose “Add New” or click the “+New” option in the top menu bar.
You should see a page that looks like this:
Joining a Group
To join a group:
- Click groups on the main menu bar just above the image on the home page at voices.wooster.edu.
- Scroll down to view a list of groups. Public groups will allow you to join right away and private groups require you to request membership.
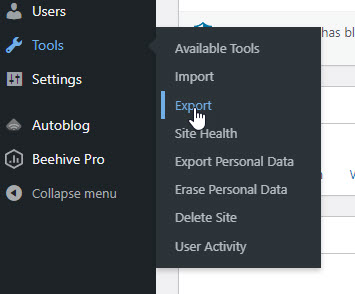
Backing up your blog
You can use the Export tool in the Tools panel to backup your posts and comments. We would recommend that everyone do this at least once a month, but once a week would be better for heavy posters or active blogs. After clicking on “Export,” click on “Download Export File” to download an XML file containing all of the posts and comments.
Customizing the look of your site
Several of the available themes allow you to customize the colors and layout of your site.
Many other themes allow you to upload a custom header image. If the theme you choose has such options, they will either be found in the Settings panel or in a new option panel added by the theme. If you would like your site’s colors to match those of the Wooster website, you can visit the The College of Wooster Visual Identity System.
If you would like to customize the fonts on your blog you can activate the Typekit Fonts for WordPress plugin and create a free account with Typekit.
Adding Users to your site
Students should register for Voices before being added to your site. You can add them individually or in groups of 10.
Adding users individually

- Go Dashboard > Users > Add New User.
- Under Add Existing User, enter the user’s College email address.
- Set the role you’d like the user to have for this site (such as “Author”).
- Click the Add Existing User button.
- A message will display: “Invitation email sent to user. A confirmation link must be clicked for them to be added to your site.”
- The user will receive an email with a link he/she must follow before being added to the site.
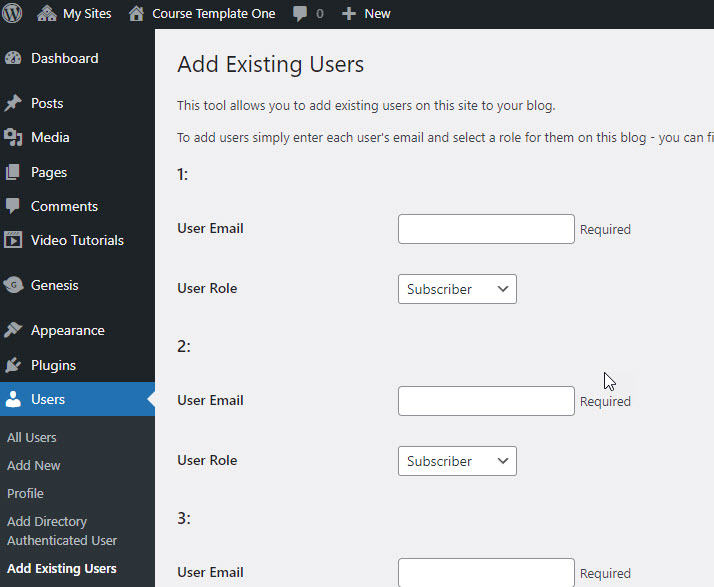
Adding multiple users at once
- Ask your students to register for Voices first.
- Activate the Add Existing Users plugin: Go Dashboard > Plugins. Navigate to Add Existing Users. Click the Activate link.
- After all students have registered for Voices, go Dashboard > Users > Add Existing Users.
- Enter the Wooster e-mail address of your student into the text box. Select the role your student should have (author, contributor). Enter up to 10 users. Click the Submit button.
- If a user cannot be found: An error message will appear: “The user with email address user28@wooster.edu could not be found.” Delete that user and check the Roles for the other users before clicking Submit.
- Repeat for additional users.

Support Videos
Support videos are available on voices.wooster.edu that will show you how to use many features of the WordPress platform. At your Dashboard, click “Video Tutorials” in the left sidebar to see tutorial options.
