-
Frequently Asked Questions
- Adding a Profile Picture
- Aruba 503H Wireless Access Point
- Classroom Technology – Frequently Asked Questions
- Controlling Camera in a Partially Upgraded Classroom
- Controlling Cameras in a Fully Upgraded Classroom
- New Updates to Mac AirPlay now Screen Mirroring on macOS Big
- Online Learning/Streaming Classroom Remote
- Partial and Full Classroom Upgrade Media Setup for Microsoft Teams
- Portable Classroom Media Setup for Microsoft Teams
- Use Apple TV in a Classroom
- Using Teams in the Streaming Classrooms
- Video Conferencing Classroom Technology
- What is Apple TV
-
Policies and Procedures
- Acceptable Use of Electronic Content
- Access to electronic content of deceased or incapacitated students, employees, and retirees
- Administrative Data Access Policy
- Administrative ERP Program Change Procedures
- Administrative ERP User Access Policy
- Affiliate Member Access & Services Request
- College of Wooster Privacy Statement: General Statement of our practices and policies
- College Technology Purchases
- Copyright Infringement Policies Procedures Sanctions
- Disposition of Used Computer Equipment
- Email Distribution List Use ("ZWD lists")
- GDPR Privacy Statement
- Guest Wireless Acceptable Use Policy
- Higher Education Opportunity Act of 2008 Compliance Plan
- InCommon Federation Participant Operational Practices
- Information Technology Policies and Procedures
- Investigations Requesting Information from IT Systems & Applications
- IT Maintenance Window
- Repair Policy Change Proposal – April 2016
- Requests for Student Information
- Safeguarding Individual Information (GLBA "Safeguards Rule")
- Technology equipment and software: how to get/fix/replace and your responsibilities for it
- The California Consumer Privacy Act
- The College of Wooster ERP Data Stewardship
- User Responsibilities and Appropriate Use Principles
- Wireless Handheld Device Allowance
- Wireless Handheld Device Allowance Request
- Wireless Networking Policy
- Show all articles ( 13 ) Collapse Articles
-
Students
-
Employees
-
Connecting to the Network
-
Software
-
- Access Your College of Wooster LinkedIn Learning Account and Connect a LinkedIn Profile
- ArcGIS Access
- Available Software
- Downloads
- Evernote
- Google Cardboard
- Google Earth and Other GIS Programs
- iMovie for Students
- Installing Maple for OS X
- Installing Maple for Windows
- Installing SALT Windows
- Keynote for Students
- Matlab
- Microsoft 365 Licensing and Email after Graduation
- Navigate the LinkedIn Learning Interface
- Omeka
- Open Source Video Editing Software
- Pages for Students
- PDF Creation for Students
- Photos
- Photoshop for Students
- Qualtrics
- RAVE Guardian
- RAWGraphs
- Remote Desktop Access Mac
- Remote Desktop Access PC
- Screen Recording
- SPSS
- Stata
- Tagging and Bookmarking
- Trint
- Video Project Workshop Outline
- Voyant Tools – Free Textual Analysis
- What Technology Do I Need at Wooster?
- What to expect as a class observer
- Wolfram Mathematica @ The College of Wooster
- Zap Works Designer
- Zotero
- Show all articles ( 24 ) Collapse Articles
-
- Access Your College of Wooster LinkedIn Learning Account and Connect a LinkedIn Profile
- Adobe Premiere Pro
- ArcGIS Access
- ARTstor
- Available Software
- BrightLink Projectors for Teaching
- Changing your Apple ID
- Connect to Network Storage and Services from OFF Campus
- Creating Informer Reports
- Downloads
- Google Cardboard
- Google Earth and Other GIS Programs
- iMovie for Teaching
- Informer Reporting
- Installing Maple for Windows
- Installing SALT Windows
- Keynote for Teaching
- Keynote Toolbar Items
- Matlab
- Navigate the LinkedIn Learning Interface
- Omeka
- Open Source Video Editing Software
- Pages for Teaching
- Photos
- Qualtrics
- Qualtrics
- Quantitative Literacy Resources
- RAVE Guardian
- RAWGraphs
- Remote Desktop Access Mac
- Remote Desktop Access PC
- Resources for Class Projects
- Room Assignments File Format
- Screen Recording
- Select Survey Training Manual
- Select Survey User Manual
- Software & Applications Requiring VPN
- SPSS
- Stata
- Tagging and Bookmarking
- Trint
- Video Project Workshop Outline
- Voyant Tools – Free Textual Analysis
- What to expect as a class observer
- Wolfram Mathematica @ The College of Wooster
- Zap Works Designer
- Zotero
- Show all articles ( 33 ) Collapse Articles
-
- Access Your College of Wooster LinkedIn Learning Account and Connect a LinkedIn Profile
- Adobe Premiere Pro
- Available Software
- BrightLink Projectors for Teaching
- Changing your Apple ID
- Connect to Network Storage and Services from OFF Campus
- Creating Informer Reports
- Downloads
- iMovie for Teaching
- Informer Reporting
- Installing Maple for OS X
- Keynote for Teaching
- Navigate the LinkedIn Learning Interface
- Pages for Teaching
- Qualtrics
- Qualtrics
- Quantitative Literacy Resources
- RAVE Guardian
- Room Assignments File Format
- Select Survey Training Manual
- Select Survey User Manual
- Software & Applications Requiring VPN
- Tagging and Bookmarking
- Zotero
- Show all articles ( 9 ) Collapse Articles
-
- ARTstor
- Audacity
- Breaking Language Barriers with Google Translate and AR
- Clipchamp video editor
- Concept Mapping
- Coolors.co
- GarageBand
- Garageband
- Google Cardboard
- iMovie
- Machinima
- Photos
- Photoshop
- Pixabay royalty free photos and videos
- Podcasting Tools
- QuickTime Player
- Screen Recording
- SketchUp
- Storyboarding
- Timeline tools
- Video Project Resources
- Windows Story Remix
- Zap Works Designer
- Show all articles ( 8 ) Collapse Articles
-
- Administrative ERP Program Change Procedures
- Administrative ERP User Access Policy
- Colleague Access Request Form
- Colleague Detailed User Guide
- Colleague UI 5 – Differences from the old version UI 4
- Creating Informer Reports
- Datatel Colleague Learning Guide Basic Navigation – Purchasing
- Datatel Colleague Navigation Keyboard Shortcuts
- Ellucian (Colleague)
- Ellucian (Datatel)
- Informer Reporting
- Name Computed Columns
- Other Datatel related forms
- Purchasing Documentation
- Room Assignments File Format
- The College of Wooster ERP Data Stewardship
- Using Select / Returning Criteria
- Show all articles ( 2 ) Collapse Articles
-
-
Printing
-
Loanable Technology
-
- Canon E05 Rebel DSLR
- Canon Vixia HF R800 HD Camcorder
- Canon Vixia Video Camera
- Conference Kit
- GoPro as a Webcam
- GoPro Hero 8 Black
- GoPro Kit
- Logitech ConferenceCam
- Logitech Webcam C930e
- Mi Sphere Camera Kit
- Overhead Document Cameras
- Portable Classroom
- Rylo 360 Camera
- Tabletop Document Cameras
- Video Adapters
- Video Chat Kit
- Show all articles ( 1 ) Collapse Articles
-
-
Microsoft 365
-
- Calendar Sharing
- Check Junk Mail
- Creating an Inbox Folder and a Rule within Outlook
- Email Distribution List Use ("ZWD lists")
- Email Setup on a Mobile Device
- Email Troubleshooting
- Forward/Redirecting your email
- Installing FindTime
- Make Outlook your default email client
- Managing Junk E-Mail
- Managing your Office 365 Quarantine
- Microsoft 365 Licensing and Email after Graduation
- Microsoft Outlook
- Missing an Email?
- New Email Accounts
- Outlook Basics
- Outlook open another mailbox
- Set up an email account in Outlook
- Using Office 365 Groups
- Using Quick Steps
- Wooster Email
- Wooster’s External Email Alert Indicators
- Show all articles ( 8 ) Collapse Articles
-
- Conducting class if you or some of your students are participating remotely
- Conducting interviews and campus talks/teaching demos with remote candidates
- Getting to know Microsoft Teams
- GoPro as a Webcam
- Making Meetings with Microsoft Teams
- Microsoft Teams Information
- Microsoft Teams Live Events
- New Recording Storage Location on Teams WITHOUT Recording Ready Email
- Online Learning/Streaming Classroom Remote
- Online Meeting
- Partial and Full Classroom Upgrade Media Setup for Microsoft Teams
- Participating in a meeting as a Guest
- Portable Classroom Media Setup for Microsoft Teams
- Scheduling a Teams Meeting
- Sharing Content in a Microsoft Teams Meeting
- Teams & Zoom comparison
- Teams Meet Now
- Teams Meeting Breakout Rooms
- Using a Scheduled Meeting
- Using Closed Captioning Within Teams
- Using Teams in the Streaming Classrooms
- Video Conferencing Classroom Technology
- Video Conferencing with The College of Wooster
- Show all articles ( 8 ) Collapse Articles
-
-
Moodle
-
Network, Cybersecurity, and Best Practices
- Encrypting Devices
- Encrypting Mac Systems
- Encrypting Mobile Devices & Tablets
- Encrypting Windows Systems
- Information & Cyber Security @ Wooster
- Protect Your Computer
- Protecting your Personal Network
- Removing VPN From your Mac
- Safeguarding Individual Information ("Red Flags", "Identity Theft")
- Securing Portable and Mobile Devices
- VPN – Mac OS 10.13 or Later
- VPN – Mobile Devices and Chromebooks
- VPN – Windows
- Wooster’s External Email Alert Indicators
-
Multi-Factor Identification (MFA)
- Change Your Password
- Changing Your Mac Password While Off Campus
- Forgotten Passwords
- How to setup MFA (Multi-Factor Authentication)
- Multifactor Authentication Instructions for using wireless networking when phone service is not available
- Multifactor authentication while out of the US.
- Password changes
- Password Policy
-
College of Wooster Password
-
Phones and Conference calls
-
Scanning
-
Resources for Retirees
-
Using the Self-Service Portal for Equipment Reservation
-
Online File Storage Options
-
Computer Lab
-
Classroom Controls
-
Classroom Setup
-
Classroom Resources
-
Classroom Troubleshooting
Formatting a double-sided IS
For help on other formatting techniques, visit our I.S. Formatting post.
An independent study typically will have the following structure.
- Front Matter
- Title page
- Abstract
- Dedication (optional)
- Acknowledgments (optional)
- Table of Contents
- List of Figures (if you have figures)
- List of Tables (if you have tables)
- Main Matter
- Introduction
- Chapters
- Back Matter
- Appendices (optional)
- Bibliography
- Index (optional)
- Afterword (optional)
With this structure it is typical for the front matter to have lowercase Roman numerals for page numbers and the rest of the document to have Arabic page numbers. The exception being the title page and back of the title page which do not get page numbers but are counted in the page total.
So, the first step in formatting your IS is to go to the Layout tab in Word and choose the Mirrored option in the Margins drop down.

Once you have done this then you should enable the show hidden formatting characters option on the home tab. This will let you see spaces, returns, page break, section breaks, and much more. It is a handy way to see why things might not be behaving the way you want.

Now you can begin adding text to your document. You might put some generic text in for a title and then at the end of your title you will want to insert an Odd Page section break from the Breaks drop down in the Layout tab. This will create a hidden page (the back of the title page) and force the next page to start on the right of the document (the next odd page after the title page). This is standard practice for double-sided documents.

Now you can go about putting in the other elements of your document. So, you can put in the abstract heading (make sure to give it the Heading 1 style) and then at the end of your abstract put another odd page section break. Put in your dedication page (odd page section break at the end) and acknowledgements page (odd page section break at the end), which typically do not have any heading text. Continue by adding your Table of Contents heading (making it a Heading 1) with an odd page break, then your List of Figures heading (if needed and Heading 1) with an odd page break, and List of Tables (if needed and Heading 1) with an odd page break.
You’ve now reached the main matter and you’ll continue in pretty much the same manner. Add your chapter title for a chapter (appendix/bibliography) and give it the Heading 1 style and at the end of the chapter put an odd page section break to force the next chapter to start on the right-hand side of the document.
When you are finished with all of your writing (or when you feel like just tinkering instead of writing), you can go back to the Table of Contents page and insert your table of contents. To do this you’ll choose the Custom Table of Contents option from the Table of Contents drop down on the References tab. Notice also that the Insert Table of Figures(Tables) option is also on the References tab. Once you do this you should have a table of contents with all of your chapter titles and any sub-sections or sub-sub-sections (as long as you use the appropriate heading style) and their page numbers.

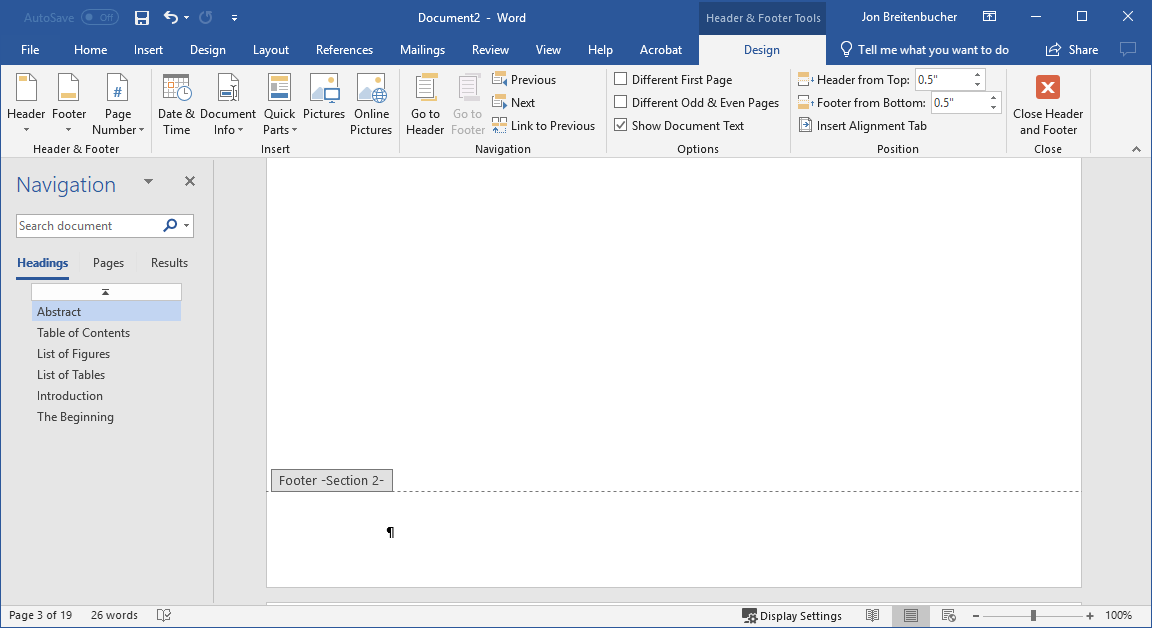
Now it’s time to add page numbers. For this you’ll need to refer to your guidelines. If your page numbers go in the center of the top or bottom margin then things are pretty straight forward. If your page numbers need to go on the outside of the page (really the only other option for double-sided documents), then it is a little more complicated.
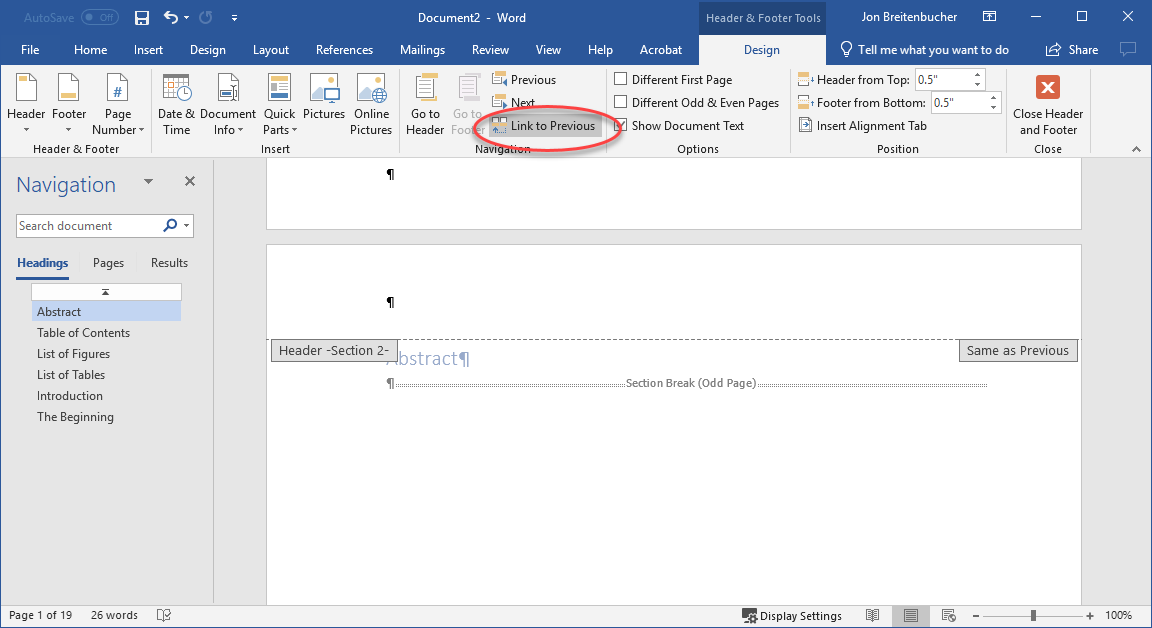
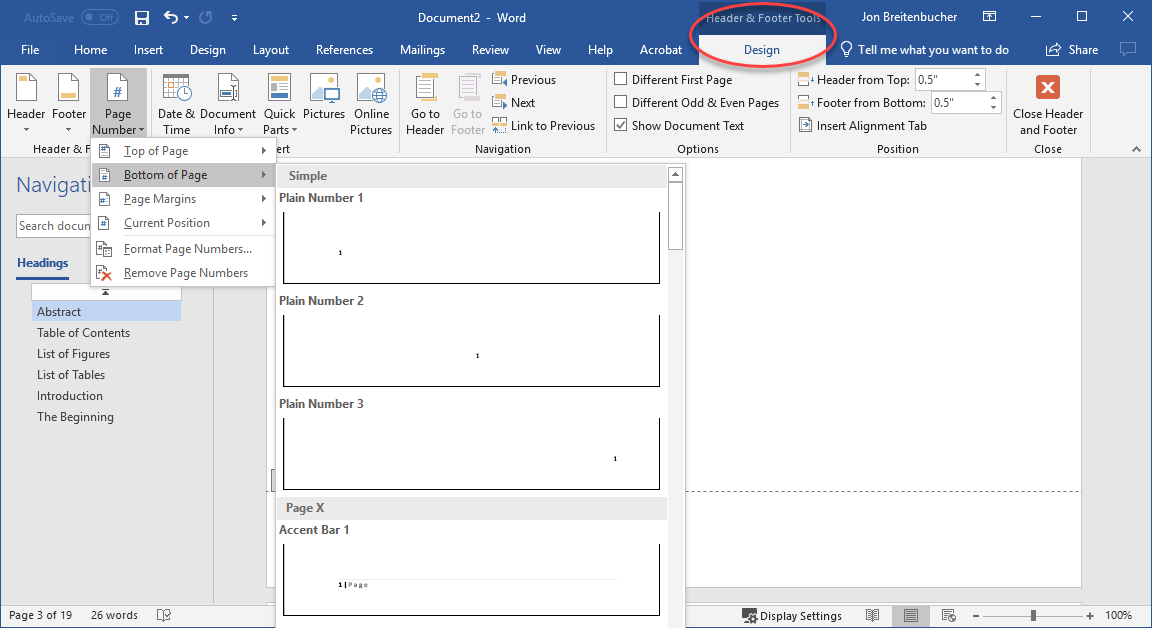
For people with centered page numbers, you want to double-click somewhere near the top or bottom of the page depending on your specified location to activate the Header & Footer formatting options. You can then choose Top of Page or Bottom of Page from the Page Number drop down menu on the Header & Footer Design tab and choose the centered option. Now you need to go back to each header or footer section and go back to the Page Number drop down and choose Format Page Numbers to be able to format the front matter page numbers as lowercase Roman numerals and to start the page number of the first page in the main matter at one instead of whatever the current page number in the document is. Also make sure to go to the header and footer of section 2 and deactivate the Link to Previous option to make sure there are no page numbers on the title page and back of the title page.


If your page numbers need to be on the outside of either the header or footer, then you will need to select the Different Odd & Even Pages option. This will create odd and even header sections. You’ll want to go to an odd header/footer section and insert a page number on the right and then go to an even header/footer section and insert a page number on the left. If Outside is a position option for page numbers in your version of Word then choose that and you don’t need to do the right and left positioning mentioned above. You’ll still need to do the same formatting step as mentioned above to format your front matter page numbers as Roman numerals and start the main matter at one.

At this point your IS should be all set for double-sided printing. If you need to do things like have numbered chapters (Chapter One (title of your chapter)), number figures/tables within chapters, restart footnote numbers at 1 in each chapter, or insert figures and tables into your IS, then feel free to stop by the Digital Media Bar where a Digital Media Assistant can help you.