
What can we help you with?
Microsoft Teams Events
Teams offers two types of events, aside from meetings, that enable users to broadcase video and content to a larger audience online. There are two type of events to know about:
- Town Halls
- for hosting a large-scale event
- when you need high-quality content sharing or streaming capabilities
- the experience is mostly consumption-based for attendees
- you’re providing extensive coverage of an even (up to 30 hours)
- Webinars
- You need participants to register for the even to set capacity limits or waitlists
- Branding themes like brand images, banners and color themes
- Presenters should have bios to market the event to internal or external users
- Please note that while Live Events is no longer being discontinued, it is recommended to use Town Halls for your Live Event needs
If you are inviting an external guest speaker to your event, you might consider sending them tips on the Teams interface if they are unfamiliar with the software.
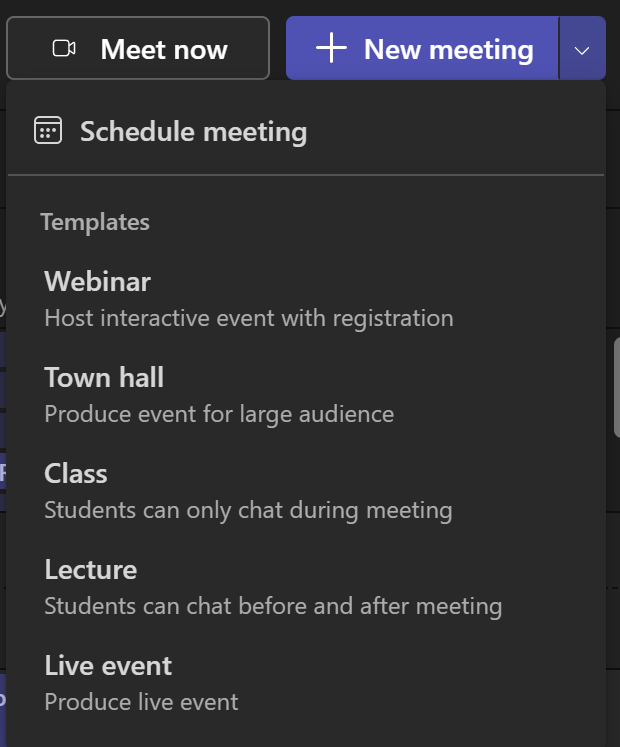
To schedule a Town Hall or Webinar, navigate to your Teams Calendar and select the drop down menu next to “New Meeting.” You will be asked to select the type of Live event you are looking to create.
Town Halls
- In Details, enter basic info, designate presenters, and more:
- Enter the event title, start and end date, and description.
- By default, the Organizer is the person who created the town hall.
- In Event group > Co-organizers or Presenters from your org, search and select other people who will help manage the town hall. You can also add external presenters.
- Note: Co-organizers will have most organizer capabilities but can’t change Details (date, time, etc.). Presenters will be able to speak and share content during the event.
- Select Save and send invites to apply changes and invite co-organizers and presenters to the event.
- In Event access, choose whether your event will be available to Your organization (members and guests of your org), Public (anyone invited or with a link to the event), or People and groups (only invited people and groups from your org)
- In Invite attendees, search and select people you want to send event invites to.
- Select Save to apply changes and continue customizing your event.
- Select Meeting options to edit more settings.
- Select Publish to schedule your town hall event and invite attendees.
For more detailed information on adding external presenters, adding branding and more, visit the Microsoft Support pages on Town Halls.
Webinars
Webinars create the opportunity to have participants register for the event, see presenter bios and have chat, interruptions and more moderated by a dedicated team behind the scenes. They also allow you to assign clear roles to participants:
- Presenters – share their ideas or provide training
- Attendees – have audio and video permissions turned off by default and can ask questions in Q&A chat
- On the New webinar page, enter the title and date of the webinar, its start and end times, and a description. You can also add presenters and co-organizers to the event.
- Tip: Consider setting a later start time for attendees on the registration form to give yourself and presenters time to prepare together before the event begins.
- By default, the webinar will be Public, or open to anyone in and outside of your organization to register. You can change it from Public to Your organization, which will make the event page and registration available only to people within your organization
- In the meeting notes section, you can add agenda items and notes, as well as assign pre-webinar tasks to presenters. This info is only shared with presenters.
- Note: Attendees won’t see the details entered on this form.
For more detailed information on how to set up, schedule and invite attendees to a Webinar, visit the Microsoft Support pages on Webinars.