
What can we help you with?
Recording a Teams Meeting
In any Meeting variety, depending on your role, you can record your meeting. If you intend to record a Teams Live Event the event may be set up to automatically record.
Staring the Recording
Once you’re int he meeting, from the top bar of your meeting, select the three dots button for “More” options. The top option should be “Record and Transcribe”
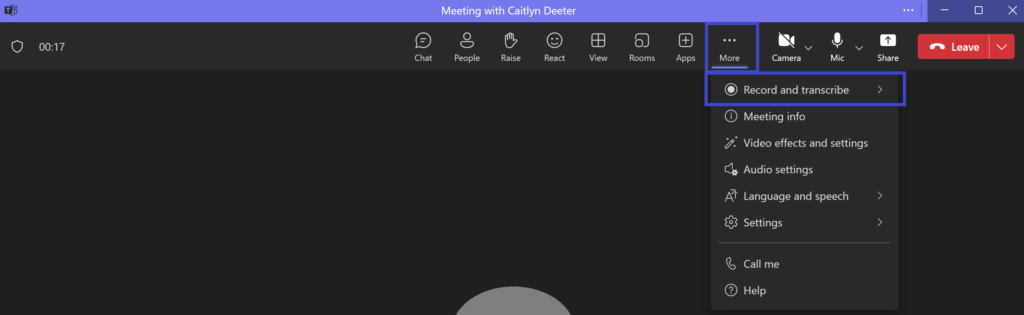
Once you select “Record and Transcribe” you’ll have the option to start the recording. When you hit record you will start both the recording and transcription at the same time.

To hide the transcription, you can either close the transcript along the left side bar with the “X” in the top right corner. Or select “more” again and under “Record and Transcribe” you will find “End Recording”, “Stop Transcription” and “Hide transcript.” It is recommended to keep the transcription process running while you are recording for accessibility, but it can be hidden within the meeting to clear the meeting interface.

Where the Recording is Stored
From a Teams meeting
If you are recording a Meeting which you’ve hosted, and not a channel meeting, the recording will be stored automatically in your OneDrive and also places a view only copy within the Teams chat. Teams no longer sends an email stating that your recording is ready to view. You can also get a transcript of the meeting through the chat feature once activated.
Once the meeting is ready, from your Recordings folder, from either the file explorer or the browser, you can share your recording much like any other file in your OneDrive
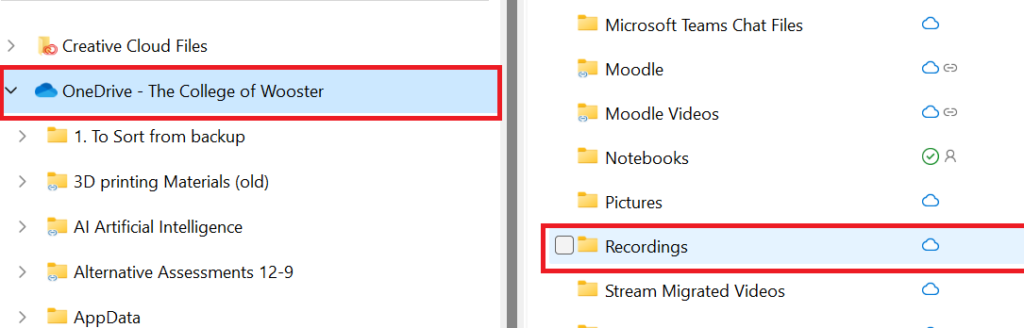
From the File explorer on your computer (Windows)
You’ll find the recording in your personal OneDrive! Once the recording is available, Teams will send you a notification through the Teams application and you can access the recorded meeting (and any future recordings) from the “Recordings” folder, in which you can rename the video, create folders with specific sharing and access permissions for students, other users and more!
From the Browser
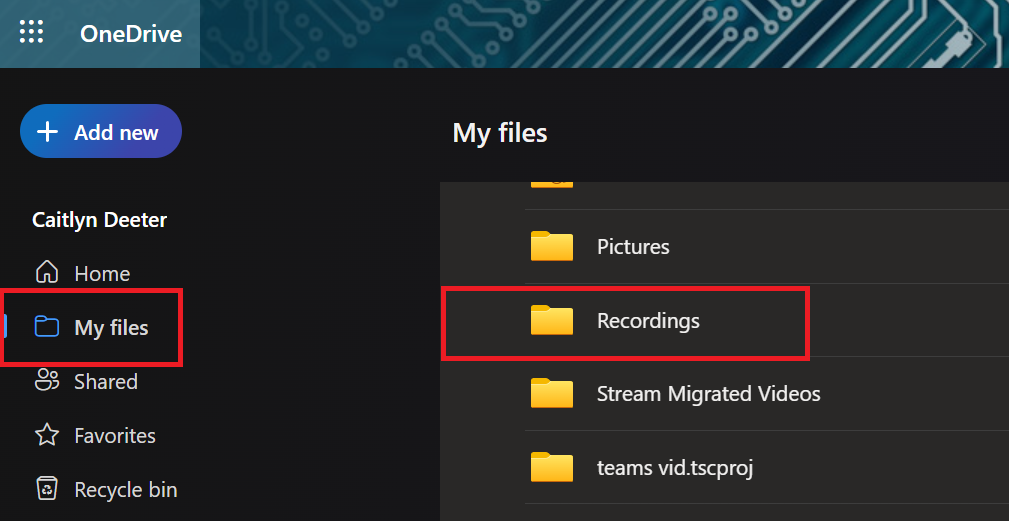
Navigate to office365.wooster.edu and in the app changer in the top left corner select OneDrive. Initially you will be taken to your “homepage” where you can see your most recently accessed and edited files, but navigating to “my files” on the left side bar will so you your folders and files more like the desktop explorer.
Much like from your file explorer, you can rename videos, create subfolders, and update sharing and access permissions within your OneDrive.
From a Channel Meeting
In a Channel Meeting a folder is created in the Files section of the channel called Recordings, which is viewable on Microsoft Stream, but can be accessed easily via Teams.
Once the recording has stopped and the meeting has ended, you can access the transcript, and recording from the Meeting post in the channel. The Meeting will expire in 60 days unless you update the expiration date itself, but can be opened within Stream and edited, downloaded, shared and more!
