
The work week runs Sunday through Saturday, with pay periods ending bi-weekly on Saturdays.
Step-by-Step Guide to Self-Self
Launch your preferred web browser (e.g., Chrome, Firefox, Safari, Edge).
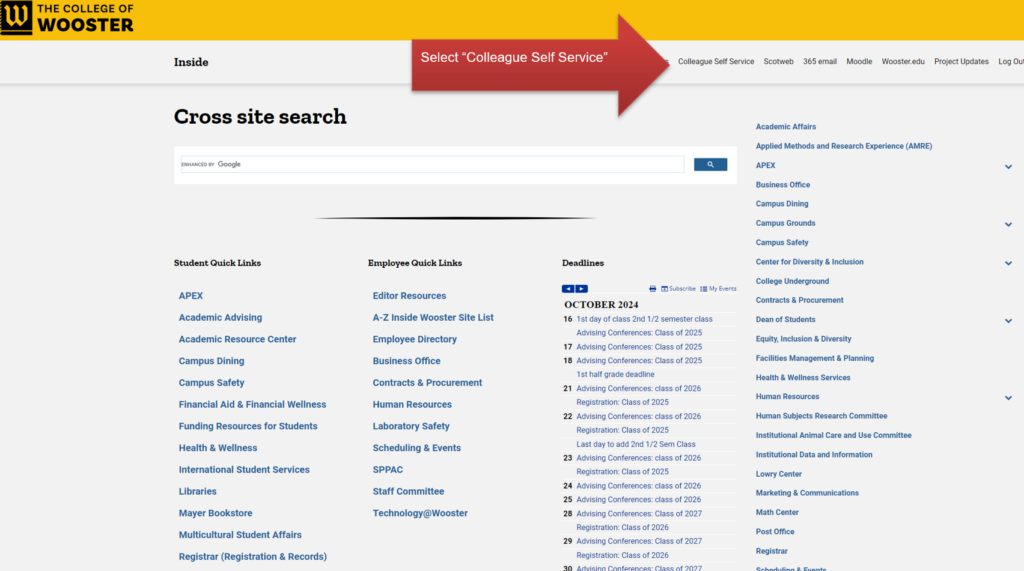
In the address bar, type http://inside.Wooster.edu and press Enter.
Alternatively, you can use your choice of search engine and search for “Wooster Self-Service” or “inside Wooster.“
Once the page loads, look for the Colleague Self-Service section on the Inside webpage. It is usually prominently located on the page.
Step-by-Step Guide to Logging into Self-Service
Click on the login area or button to access the login screen.
Enter your username and password in the respective fields. Make sure to input them correctly, respecting any case sensitivity.
After entering your Wooster username and password, click the Login button to access your account.
Follow the prompts to verify your identity (e.g., entering a code sent to your mobile device).
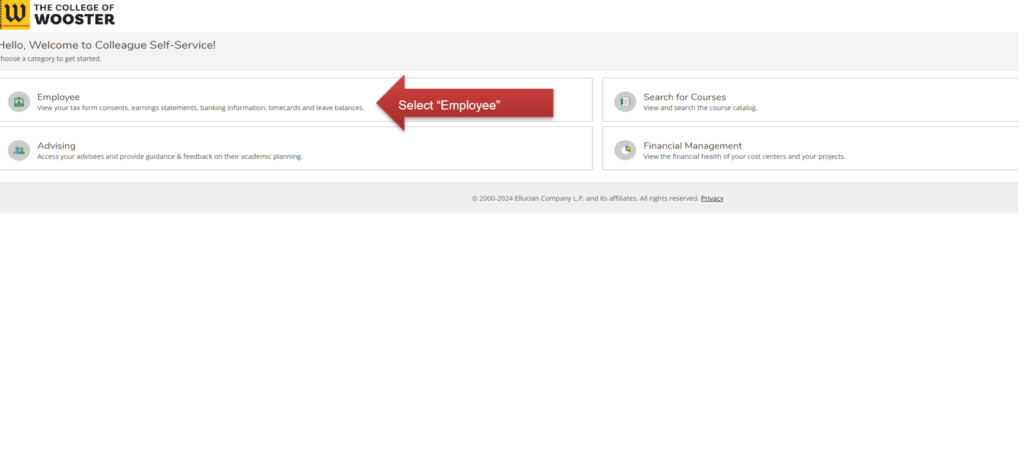
After successfully logging in, you should be directed to the Self-Service dashboard, where you can manage your tasks, including time approvals, payroll, and other services.

Step-by-Step Guide to Navigating the Self-Service Dashboard
In the navigation menu, find and click on the Employee tab or link. This will take you to the Employee section, where you can access various functions related to your employment.
Step-by-Step Guide to Navigating the Self-Service Dashboard
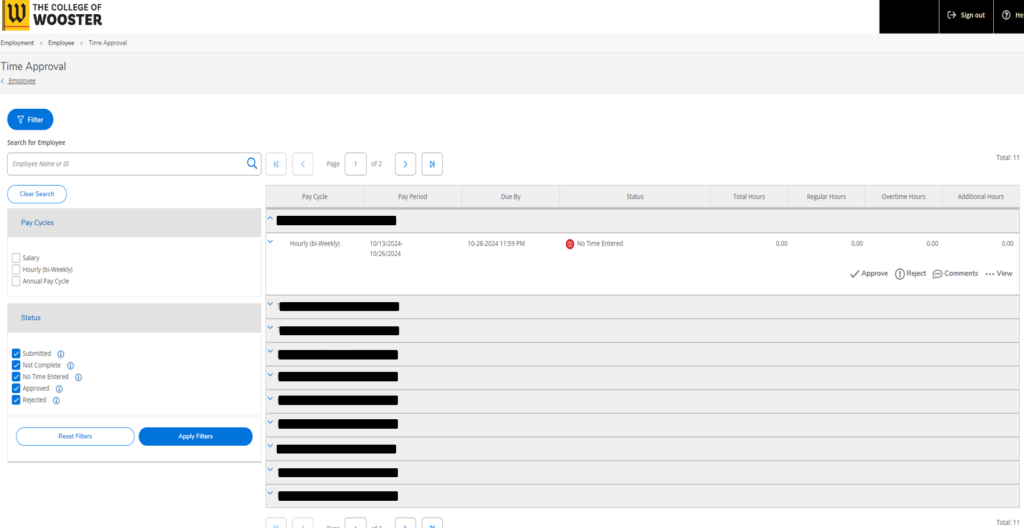
In the navigation menu, find and click on the Time Approval tab or link. This will direct you to the Time Approval section, where you can approve or reject timecards for the employees you supervise.
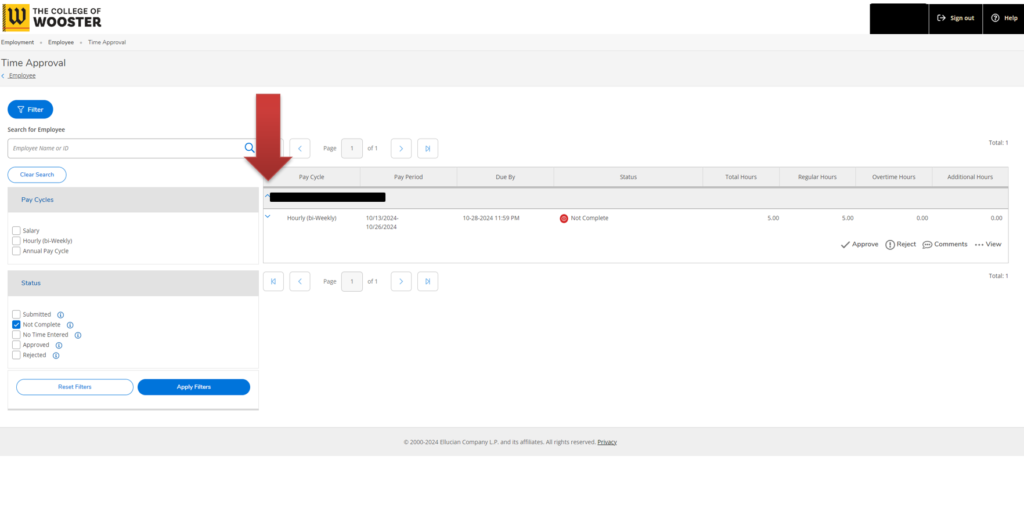
The first time you access the Time Approval Summary page, you must either search for an employee or click Apply Filter to retrieve data, even if you do not select Pay Cycles or Status filters. After your initial data retrieval, Self-Service will remember your filter selections and automatically apply them when you return to the summary page, until you change them, click Clear Search, or Reset Filters. The Filter button toggles the filter panel on or off.
If you click on Apply Filters without choosing any additional options, it will display a list of all employees you supervise.

If you don’t see the Employee tab, check if there is a drop-down menu or additional tabs that may contain it. Familiarize yourself with other sections of the dashboard for quick access to other relevant information.
Step-by-Step Guide to Navigating the Time Approval Webpage
This section displays a list of employees. If you need to see more entries, you can navigate through the list using the page left and page right arrows.
The first time you access the Time Approval summary page, you must either search for an employee or click Apply Filter to retrieve data. You don’t need to select Pay Cycles or Status filters at this point.
This section should display a list of employees. If you want to see more entries, use the page left and page right arrows to navigate through the list.
To view specific employees, click on the Filter button to open the filter panel. Customize your filter selections according to your needs and then click Apply Filters. This will refine the employee list to those you supervise.
Note: To view the employees you supervise, you will need to apply filters. These filters can be customized to best suit your needs.
Step-by-Step Guide to Navigating the Time Approval Webpage (Continued)
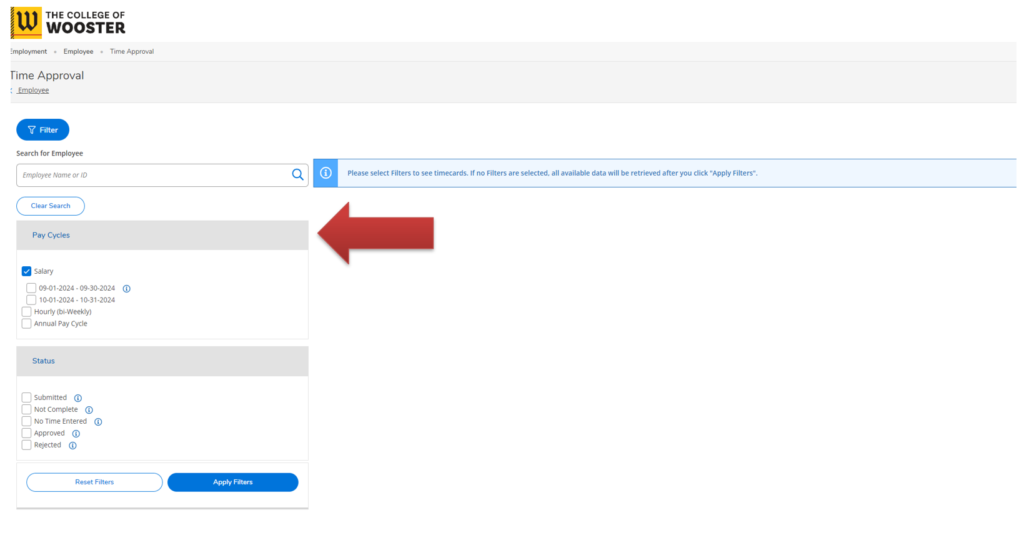
Select Employee Type: In this example, I chose Salaried employees. Since I do not supervise any salaried employees, the system returned a message indicating that no timecards are available.
Viewing Available Timecards: If you do supervise salaried employees, selecting the Salaried option will display a list of those employees along with their corresponding timecards.
Adjusting Employee Type: If you receive a message indicating no available timecards, consider switching back to the Hourly employee filter or checking if there are any salaried employees under your supervision.
Step-by-Step Guide to Navigating the Time Approval Webpage (Continued)
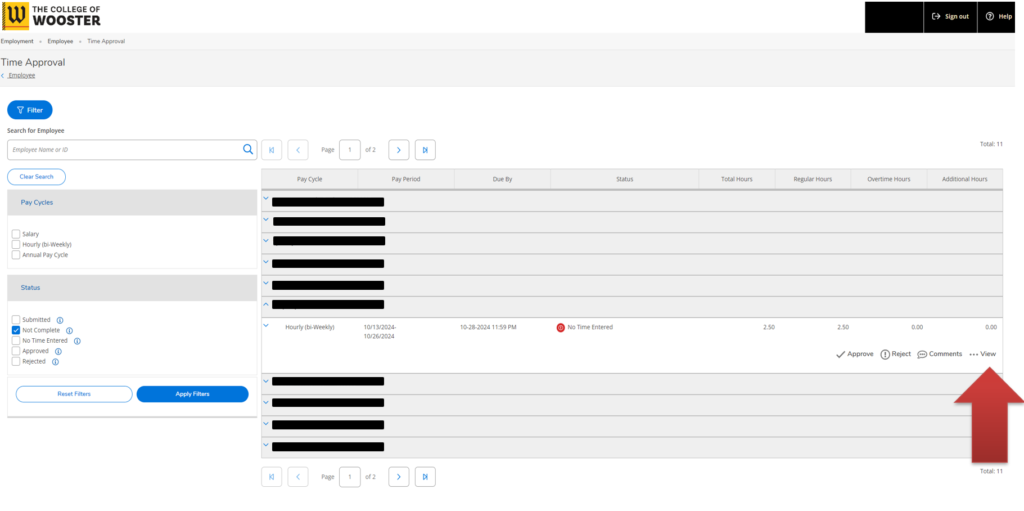
This screen displays the employees who have entered the time that you supervise.
To view more information about a specific employee, click the down arrow beside their name. This will provide an expanded view showing detailed time entries for that employee.
Additional Tips
Ensure you thoroughly review each employee’s time entries, as accuracy is essential for proper payroll processing. If you need to approve time for multiple employees, consider expanding the views one at a time to maintain an organized workflow.
Step-by-Step Guide to Navigating the Time Approval Webpage (Continued)
Click on the View button located on the right side of the employee’s entry to see the specific time that the employee has submitted.
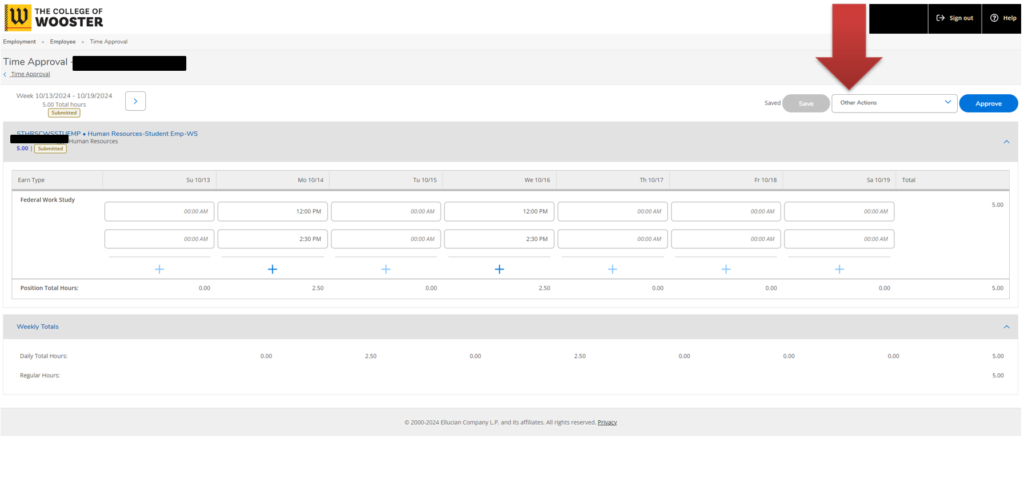
In the view screen, you will see the details of the time entered by the employee, including dates, hours worked, and any relevant comments.
Step-by-Step Guide to Navigating the Time Approval Webpage (Continued)
If you are not comfortable approving the time entry, you can select the Other Actions option to reject the timecard.
When you choose to reject the timecard, a prompt will appear allowing you to enter comments. Use this section to provide constructive feedback or specify the reason for rejection. This information will be sent back to the employee for correction.
After entering your comments, confirm the rejection by clicking the appropriate button (usually labeled Reject or similar). This action will send the timecard back to the employee for them to make the necessary adjustments.
Keep a record of any timecards you have rejected, along with the comments provided, to ensure clear communication and to follow up on the corrections.
Additional Tips
Providing clear and specific comments when rejecting a timecard can help the employee understand what needs to be corrected. Regularly check for any resubmitted timecards to maintain timely approvals for payroll processing.
Step-by-Step Guide to Navigating the Time Approval Process (Continued)
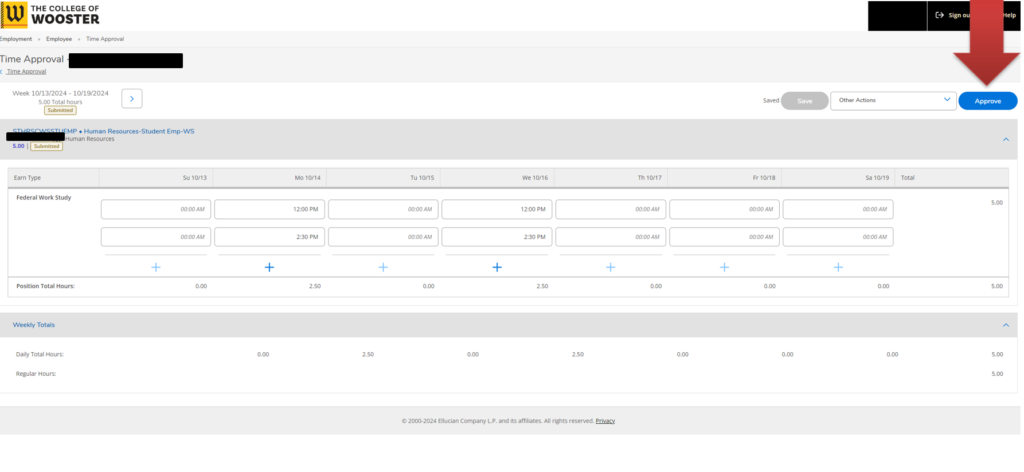
If the time is correct as entered, simply click the Approve button located in the upper right corner of the screen to approve the timecard.
After clicking Approve, you should receive a confirmation message indicating that the time entry has been successfully approved.
Additional Tips
If you edit any entries, ensure to double-check the changes before approving to maintain accuracy. Keep track of any changes made for record-keeping purposes, especially if you’re managing multiple employees.
Step-by-Step Guide to Navigating the Time Approval Process (Continued)
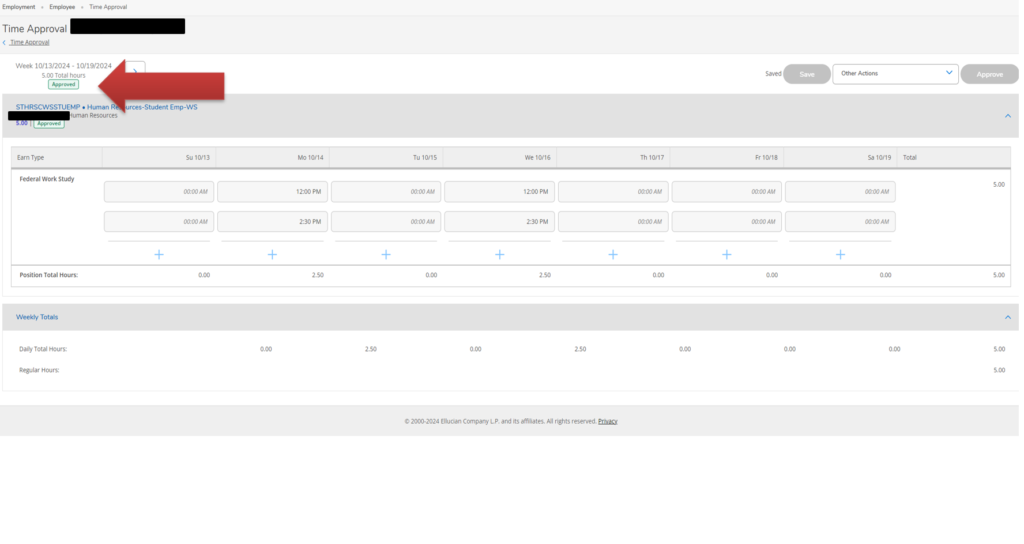
Once you have approved the time entry, it will be marked as Approved for that week.
You will see the status indicated in green on the top right side of the screen, confirming that the time has been successfully approved.
You can refer back to this status at any time to verify which timecards have been approved, ensuring clarity in your records.
Additional Tips
Regularly monitor the approval statuses to ensure all timecards are processed before payroll deadlines. If you encounter discrepancies or need to revisit approved time entries, check the history or logs available on the Time Approval webpage.
Step-by-Step Guide to Navigating the Time Approval Webpage (Continued)
After approving the time entries, you can return to the Time Approval section.
When you return, the employee’s time will now be marked as Approved for that week, providing a clear indication of the approval status.
The approval status will be displayed in green on the top right side of the screen, confirming that the time has been successfully approved.

Additional Tips
Regularly check the Time Approval section to monitor the approval statuses of all employees under your supervision. Ensure to follow up on any timecards that are pending approval to maintain a smooth payroll process.
Step-by-Step Guide to Assign a Proxy for Time Approvals
Open your web browser and navigate to the Self-Service login page. Enter your credentials to log in.
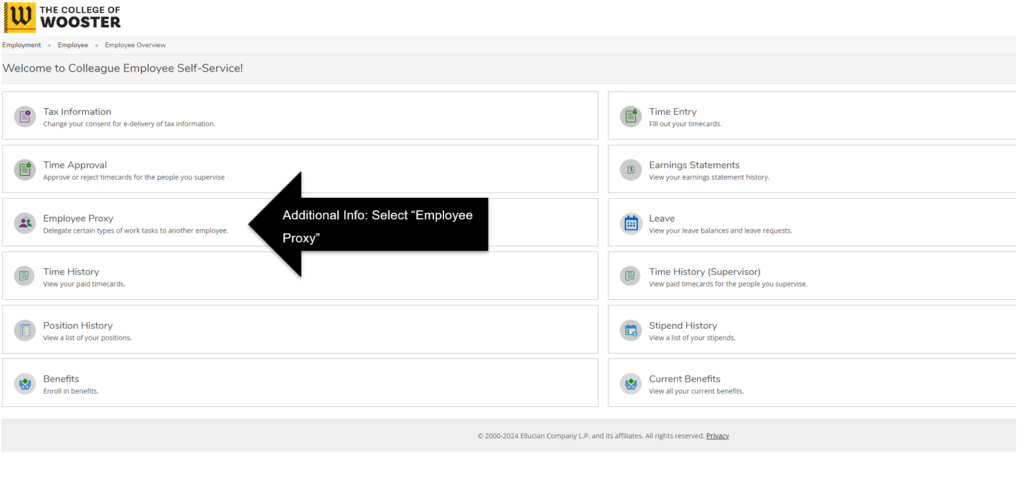
Once logged in, find and click on the Employee tab located in the main navigation menu.
In the Employee tab, look for the Time Approval section and click on it.
You will see an option to select a proxy type. Choose Time Approval from the dropdown menu.
Enter the date when the proxy will start approving time (format: mm-dd-yyyy). Then enter the date when the proxy will stop approving time (format: mm-dd-yyyy).
In the Search for Proxy box, type the name of the employee you wish to assign as the proxy for time approval. After finding the correct employee in the search results, click Add Proxy to finalize the assignment.
Important Notes
Make sure you select a qualified employee who can handle the time approval responsibilities during your absence.
It’s a good practice to inform the employee about their new role as a proxy and any specific expectations you may have.
If you encounter any issues during this process, consider reaching out to your HR department or IT support for assistance.