Why Perusall?
Perusall is an e-reader platform that allows students and faculty to annotate assigned readings, text, video and more. It allows for social engagement that is like social media platforms.
To learn more about pedagogical applications, read Perusall’s Student Collaboration page.
To explore feature updates, see the Perusall Blog or their changelog for ongoing updates.
Students: see student support below.
Course Choice
Perusall has been a free service with no ads supported by users, by institutions that purchase licenses, and by publishers when an ebook is assigned through their catalog.
Perusall added a new step to the course setup process. Instructors creating a course using free materials at an institution without a license will be asked to choose an access fee for students. Perusall suggests instructors choose $15, but you may choose $0. Learn more about Course Choice.
Perusall 1.3
Note: Perusall’s version 1.3 was available starting in Moodle 2023-24.
There are several benefits to LTI 1.3 (external tool link in Moodle).
- First, creating individual assignment links aka. “deep links” in your LMS is no longer necessary to sync individual assignment scores to your LMS. Add one generic Perusall link to the Moodle course that student use to access Perusall, and individual assignment scores will still be sent to the Moodle gradebook. You can still choose to create individual assignment “deep links” which point to particular Perusall assignments, even when the link and assignment do not have matching names. (Note: depending on your grade book sync settings, individual links are automatically created in the Moodle gradebook as you create Perusall assignments.)
- Second, your Moodle course roster automatically syncs to your Perusall course; instructors will be able to view the full roster in Perusall even before students ever launch into Perusall. That way, instructors can set up groups in advance of the start of the semester.
- Third, syncing grades from Perusall back to Moodle is improved. Please see Perusall’s article Grade sync in LTI 1.3 – Perusall and scroll down to the “Setting up gradebook sync” section of the Overview of LMS integration article.
How do I use Perusall?
The College of Wooster instructors and students have free access to Perusall through Moodle (LMS). It is important to launch Perusall from your Moodle course so that Perusall will create a new, blank course for you to create Perusall assignments that is connected to the Moodle course. When students launch Perusall from the Moodle course, they’ll be taken to this corresponding Perusall course without creating an account.
Perusall Support
Please visit these Perusall support pages:
For other support:
- Perusall hosts how-to webinars (live and recorded) and office hours.
- For on-demand help, visit Perusall’s Knowledgebase.
- For new updated features, visit Perusall’s Changelog.
Educational Technology has put together some resources including videos to help walk you through from setting up to grading Perusall assignments. See our handouts:
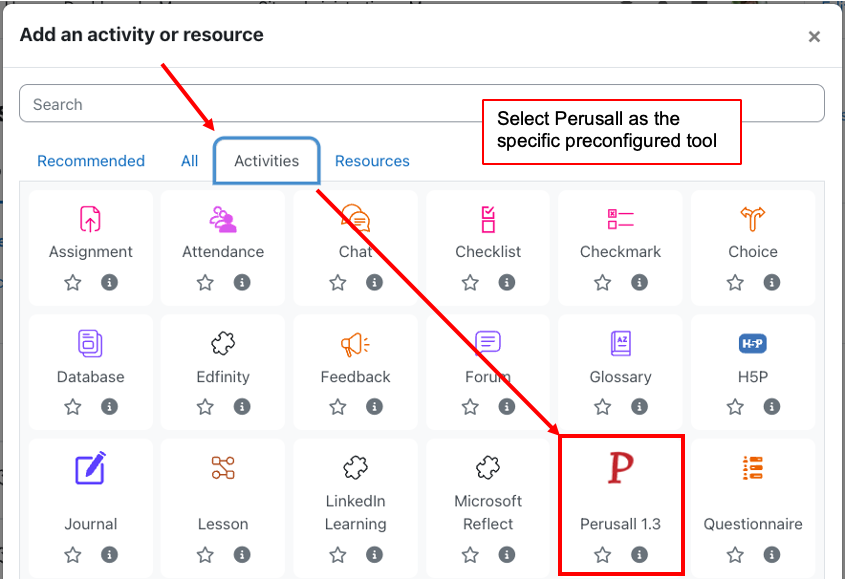
Step 1: Add the Perusall Activity to your Moodle Course
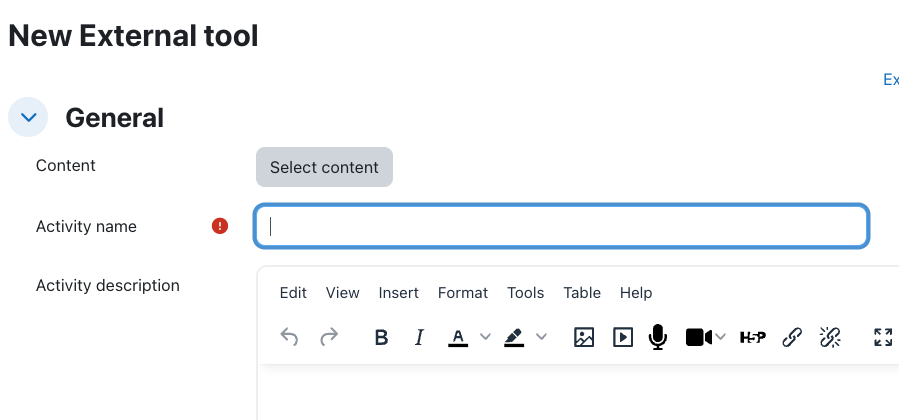
To use Perusall in your course, use the “Add an activity or resource” to create the link from your Moodle course to your Perusall account.


Step 2: Setup your Perusall Course
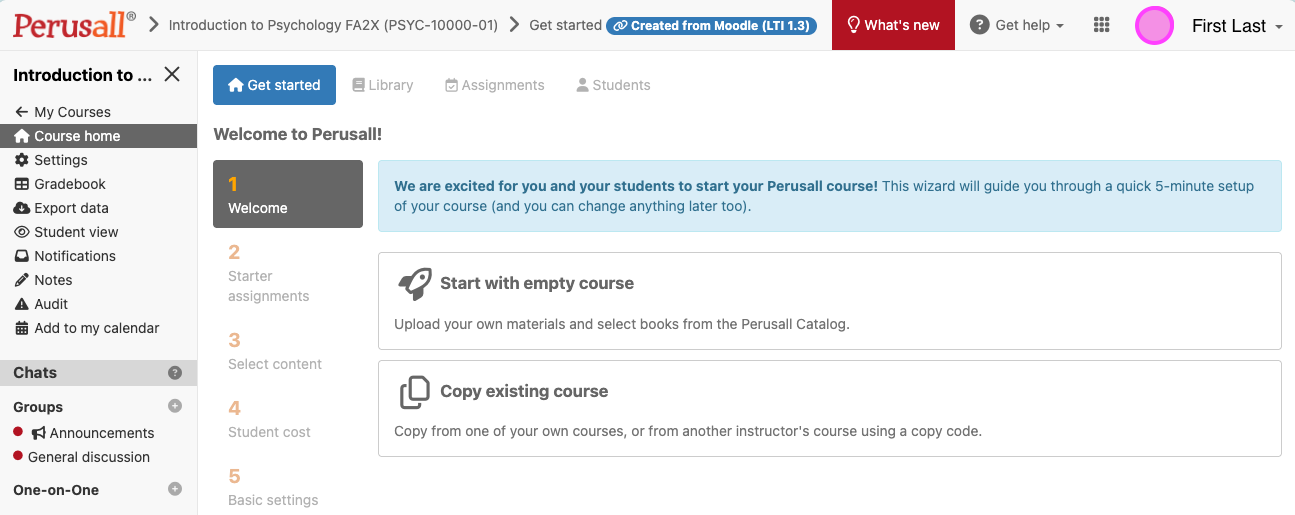
On the homepage of your Perusall Course, you will now see five steps to help you set up your Perusall course. The steps below follow those four steps. You will receive green check marks as you have completed the actions.

You can also visit the Settings tab to adjust your course settings. This includes the following:
- Add a personalized message
- Changing how Perusall handles groups
- Manually add scores to Moodle or do not sync grades back to Moodle
Watch our video on Perusall to learn how to adjust your course settings.
You can reuse Perusall materials from a previous course.
- See Perusall’s How do I use Perusall to teach the same course again? article.
- If a colleague is sharing Persuall materials with you or if you have used a separate Perusall account, you can use a copy code. See Perusall’s How do I collaborate with other instructors?
Step 3: Add Materials to Perusall
Visit the Library tab to add your materials that you intend to use for the assignments. You can add the following types of materials to Perusall:
- Books from the Perusall Catalog
- Web Page
- Documents from Dropbox
- Documents from your computer
- Materials from another Perusall course
- Video
- Podcast episode
See Perusall’s Getting Started article for additional help.
Step 4: Create Assignments
Create your assignments by visiting the Assignment tab in Perusall and clicking on the green button “Add assignment.” You can also add an assignment via the library.

Step 5: (optional!) Create Links in Moodle for Students to Access Content
There is no need to create individual links to each Perusall assignment; however, if you would like to do so, you can create “deep links” into the corresponding Perusall assignment.
After creating your assignments in Perusall, you can create the assignments in Moodle so your students can click to take them into Perusall. Using version 1.3,
- Build Assignment in Perusall
- In Moodle, add an external tool link and select the Perusall assignment from the list
- Students do not need to click each link in order for all grades to sync.
Visit the section “Assignment-Specific (Deep links) Creation” on the Moodle Instructor Setup page for step-by-step instructions.
Step 6: Guide Your Students
Students do not create Perusall accounts at Perusall.com; they simply select the link from your Moodle course and are taken to Perusall in an automatically connected account.
For additional guidance, students can consult:
- Perusall’s knowledgebase articles for Students especially A student’s guide to navigating Perusall.
- Be aware we are using the LMS method. Skip the very first part of the article: do not create a Persuall account or enroll in the course. Students are already enrolled.
- Ed Tech’s handout: How to Use Perusall for Students.docx
