
Microsoft Teams continues to evolve, introducing exciting new features to enhance your collaboration experience. In this guide, we’ll not only cover the recent updates but also provide you with a comprehensive set of tips categorized into three main sections: Before the Video Call Meeting, During the Video Call Meeting, and After the Video Call Meeting. These tips will help you make the most of Teams’ functionality, ensuring smooth and effective virtual interactions. This list will be updated frequently so be sure to check back often. If there is something that you think we should add, please let us know.
Tips to Take Before a Video Call Meeting:
- Keep your Teams updated
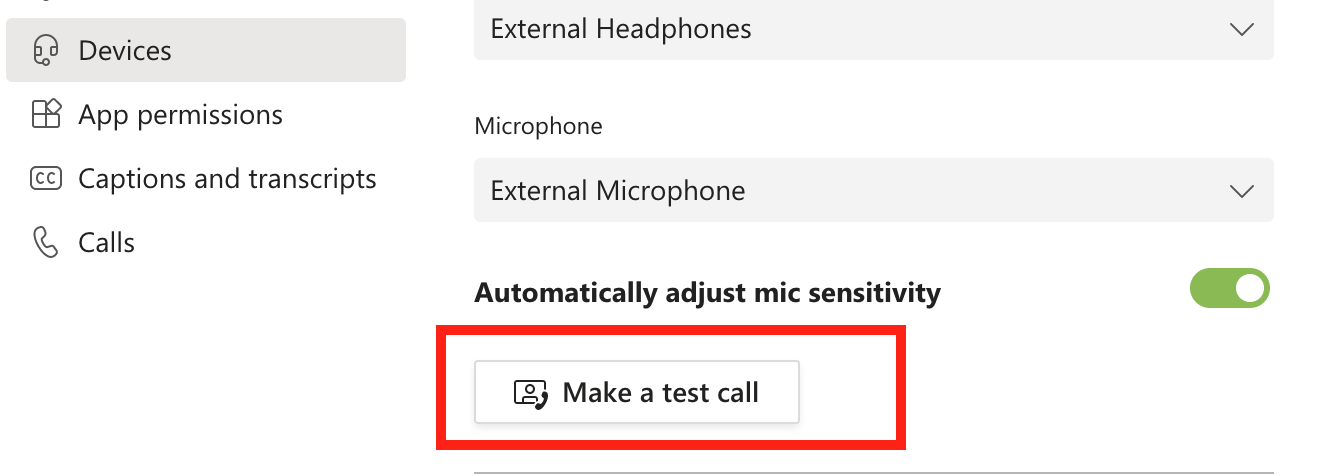
- Practice hosting a video call meeting before you do the real meeting to test out your equipment and space to troubleshoot any errors. A colleague or student can help to test the call. You can also use the test call feature in Teams to make sure that everything is properly hooked up (see image below).
- Familiarize yourself with the Teams interface
- Practice the features available during a video call meeting including recording, sharing your screen, and using the chat.
- Create a backup communication plan in case you or your participants have trouble connecting to the meeting. The backup plan might include the following: connecting to the meeting through a different device, collaborate through an online collaboration tool (i.e. Word Online) and record the meeting.
- Choose a trusted colleague or student (i.e.TA or CDA) to monitor the chats for you while you are doing the discussion.
Tips for During the Video Call Meeting
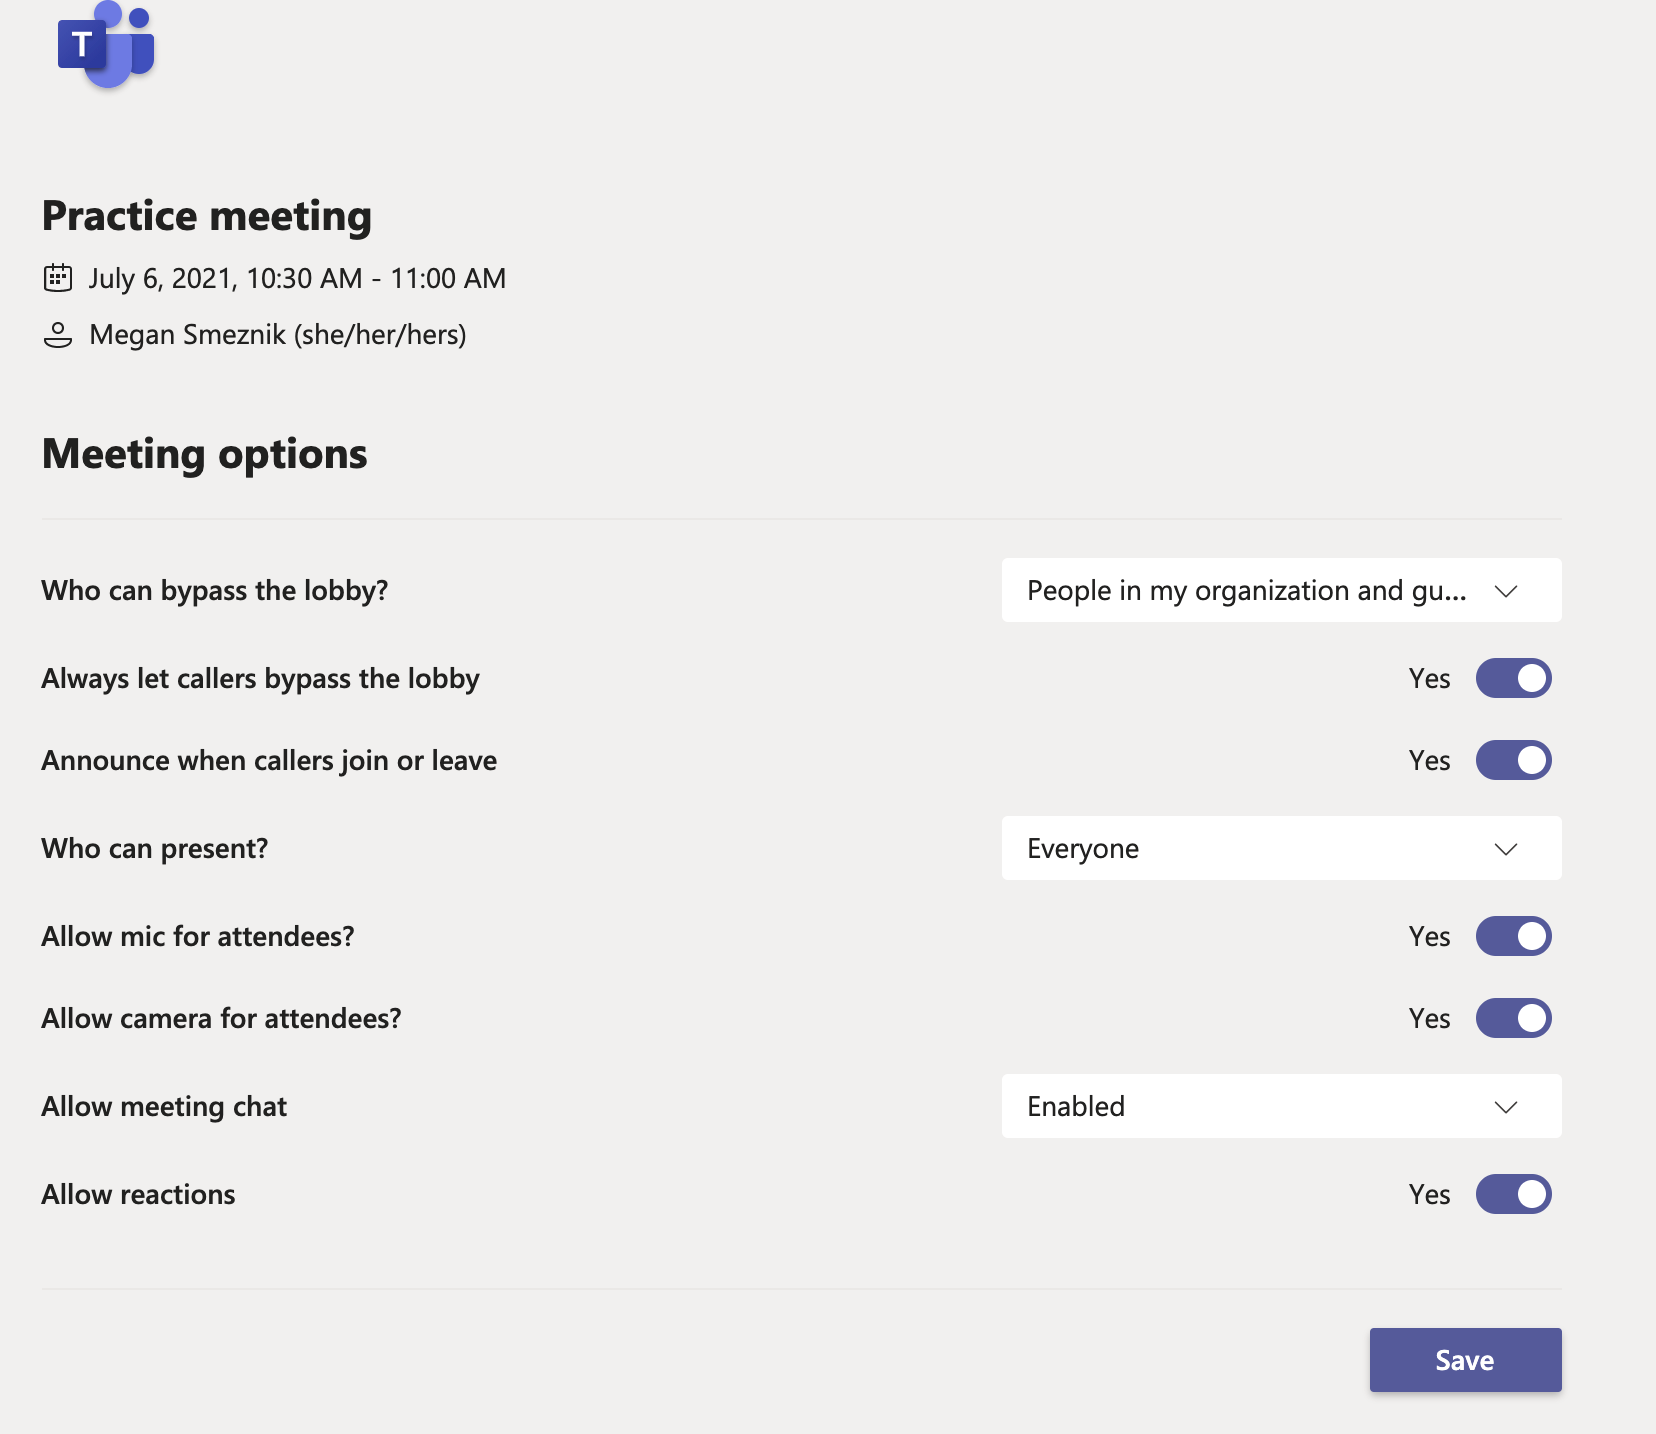
- Adjust the meeting settings ahead of time to ensure that participants have their mics muted when entering the call.
- Use background blur and background effects (only on Desktop and iOS mobile) to minimize distractions.
- Ensure that all participants can see and hear other participants as appropriate for the meeting
- Take turns using your video cameras for the discussion to ensure a better call quality
- Establish visual or verbal cues when someone wants to actively contribute to the meeting, this is where monitoring the chats will be useful. This might include using the raise hands feature.
- Provide an agenda to participants which might include an overview of topics
- When sharing a web page, zoom in. Ctrl/Cmd+= will zoom for most browsers.
- Use the chat to help share resources, information, and ask questions during the meeting to limit interruptions.
- Record the video session for others who were not able to attend, if applicable.
Tips for After the Video Call Meeting
- Remind all the attendees to the meeting that chat and video recording (if applicable) will be available afterwards for everyone to access.
- Visit Stream after your video is done processing to get the share code to share with participants via email or Moodle
- Follow up with your participants and others who may have missed the virtual meeting to share valuable links and more.
Tips for Using Private Chats in Teams
- Use private chats for questions with specific people or to ping someone
- Teams private chat is equivalent to any other instant messaging service.
- Name your chats with a specific name to make it easier to find.
- File uploads in the chats are saved to OneDrive. The file automatically uploads to the Chat Files folder in the OneDrive of the person who uploads it and it is automatically shared with everyone in the chat.
- If you already have a chat going with three people and you create a new chat with those same three people, there will be two different chats with individuals in two different conversations. So avoid duplicating chats at all possible.
- Add participants to the chat and decide whether that they get to see the prior discussions
- If you have a lot of people in a private chat (10 or more), it justifies considering creating an Outlook group to create a Team (important for workings groups).
- Pay attention to individuals availability status in Teams to be courtesy when sending a reply to a chat (when applicable).
Tips for Using New Features in Teams during the Video Call Meeting
1. Microsoft Teams introduces a new feature that enhances your meeting experience – the ability to easily zoom in and out during meetings. Whether you’re reviewing a shared window of PowerPoint, a desktop, or a PowerPoint Live presentation, this feature allows you to focus on specific details without affecting what others see on their screens. Here’s how to use the enhanced zoom feature:
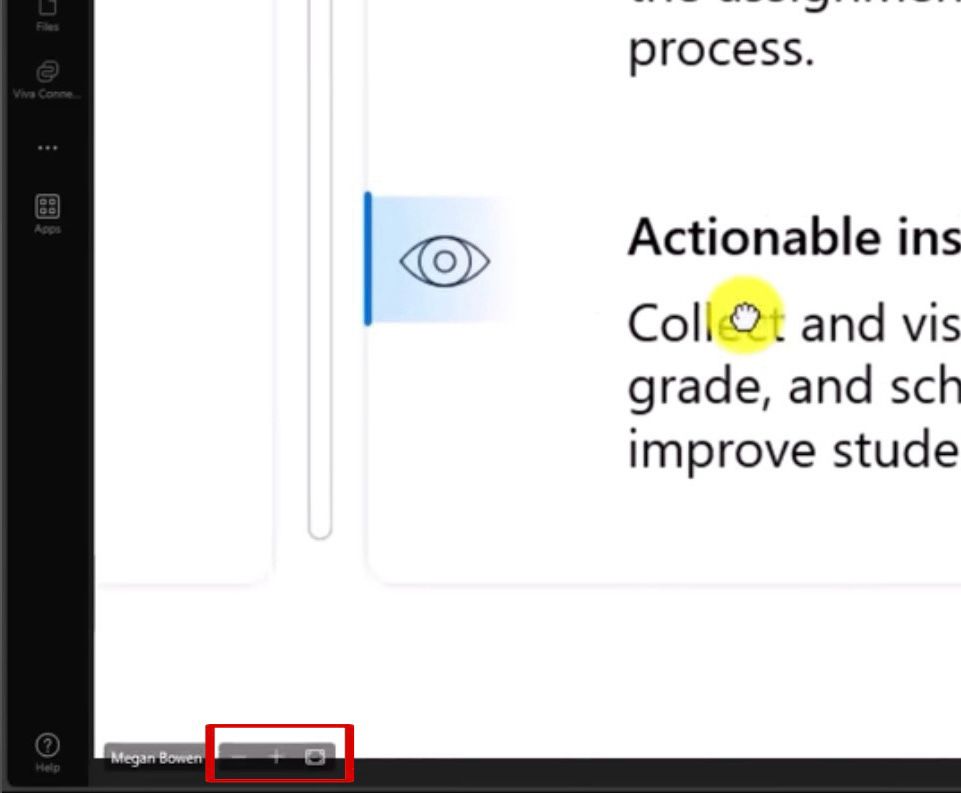
- Zoom In: When viewing a shared window, such as PowerPoint, locate the plus (+) icon in the lower left corner. Clicking the plus icon will zoom in, allowing you to closely examine content.
- Zoom Out: To zoom out, simply click the minus (-) icon. You can adjust the zoom level as needed, panning around the content to focus on specific areas.
- Full Screen: Hit the full-screen option in the lower left corner to quickly return to the default 100% zoom level.
This Zoom In/Out and Full Screen feature can be found in the “8 New features in Microsoft Teams for Summer 2023” YouTube video, starting at 2:02.
2. Microsoft Teams introduces a second new feature that adds flair to your meetings – enhanced meeting backgrounds. Now, you can personalize your meeting environment with a variety of backgrounds to make your virtual meetings more engaging. Here’s how to explore and apply these new backgrounds:
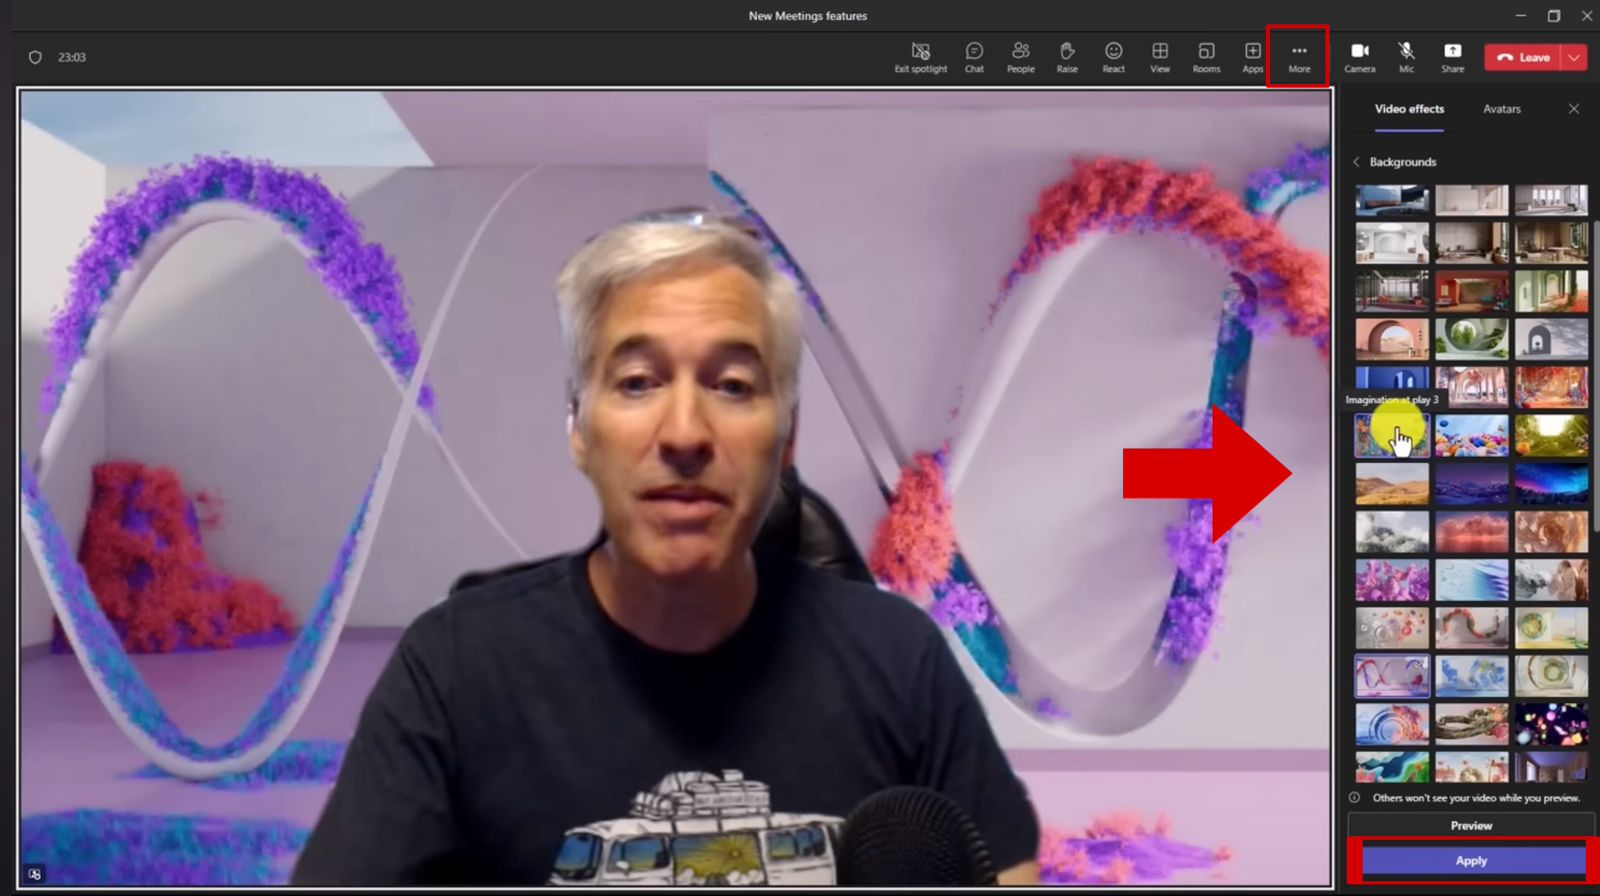
- Click on the three-dot menu during a Teams meeting and select “Effects and Avatars.” Within this menu, you’ll find the option for backgrounds.
- Teams already offer a range of standard backgrounds. Apply them by choosing your preferred option from the available list.
- Teams introduces exciting new additions to the standard backgrounds. Some of the fresh options include “Escape Artist,” a vibrant green background, and others inspired by popular themes. Click “Show All” to explore an extensive collection of backgrounds. From dreamy landscapes to DNA-themed backgrounds, there’s a wide variety to choose from.
- Once you find a background that suits your style, hit “Apply” to instantly transform your meeting environment.
Experiment with different options to find the perfect backdrop for your virtual collaboration! This new feature can be found in the “8 New features in Microsoft Teams for Summer 2023” YouTube video, starting at 2:37.
3. Microsoft Teams brings a third new feature to the table, adding an element of fun and creativity to your meetings – Snapchat filters! In collaboration with Snapchat, Teams now integrates a range of filters to make your virtual meetings more enjoyable. Here’s how you can bring some playful elements to your meetings using Snapchat filters:
- On the right side of your Teams meeting screen, locate the filters section. You’ll find three options: Backgrounds, Frames (from Microsoft), and Styles (also from Microsoft). Choose Snapchat to access the fun filters.
- Once in the Snapchat filters section, browse through a variety of entertaining filters. From orange sunglasses to funny mushrooms, the options are diverse and amusing.
- Select a filter and see it in action during your meeting. Experiment with different filters to add a touch of humor or creativity to your virtual presence.
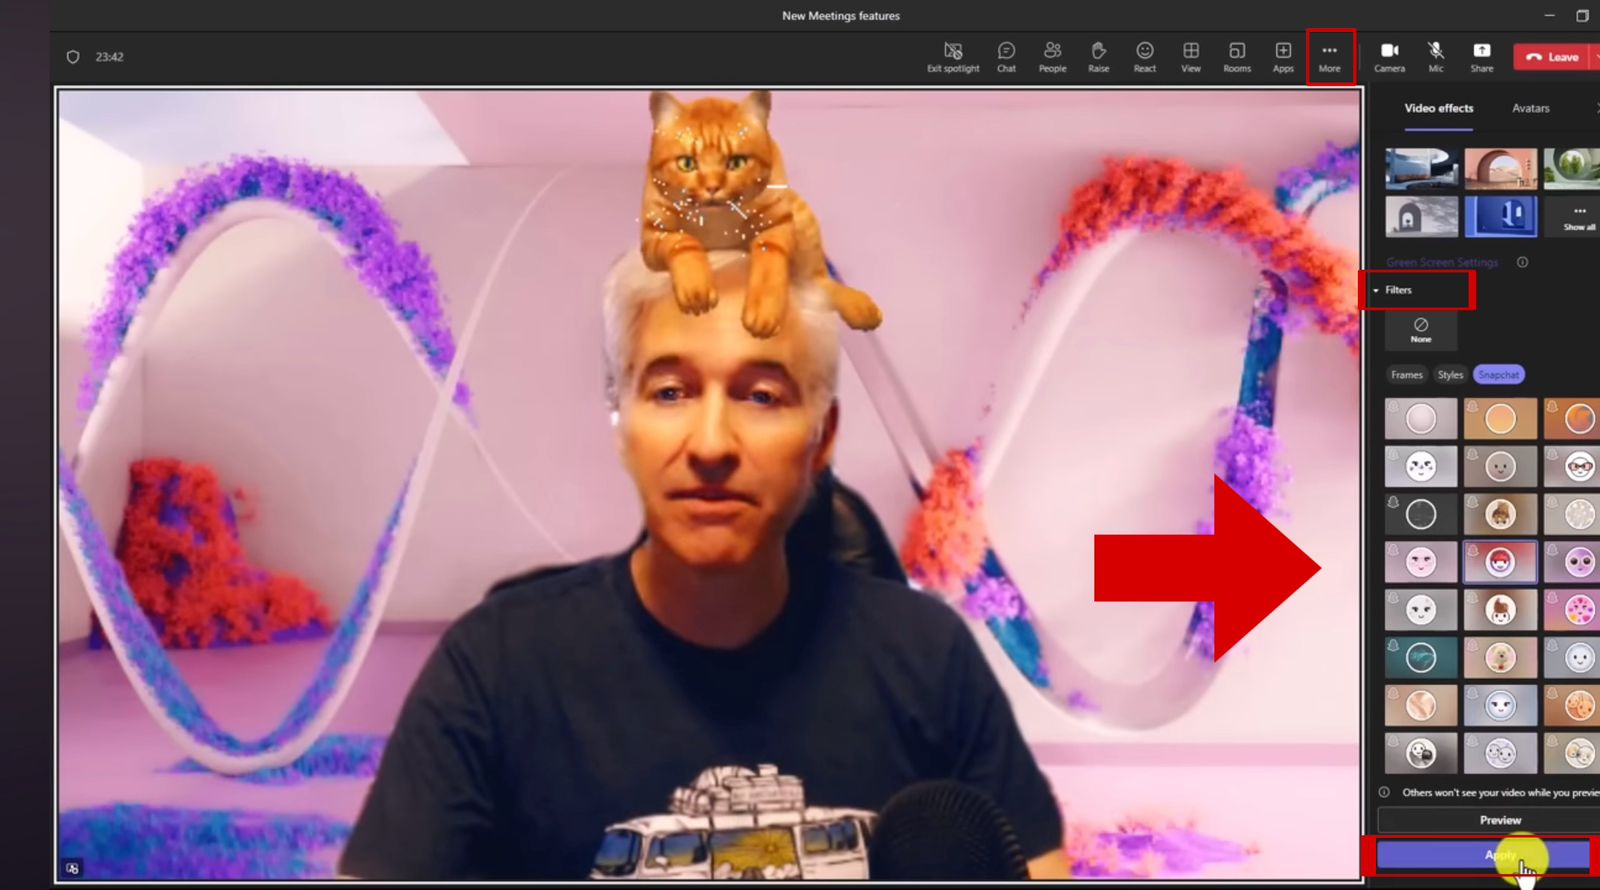
Bring a smile to your virtual meetings by incorporating Snapchat filters. This new feature can be found in the “8 New features in Microsoft Teams for Summer 2023” YouTube video, starting at 3:17.
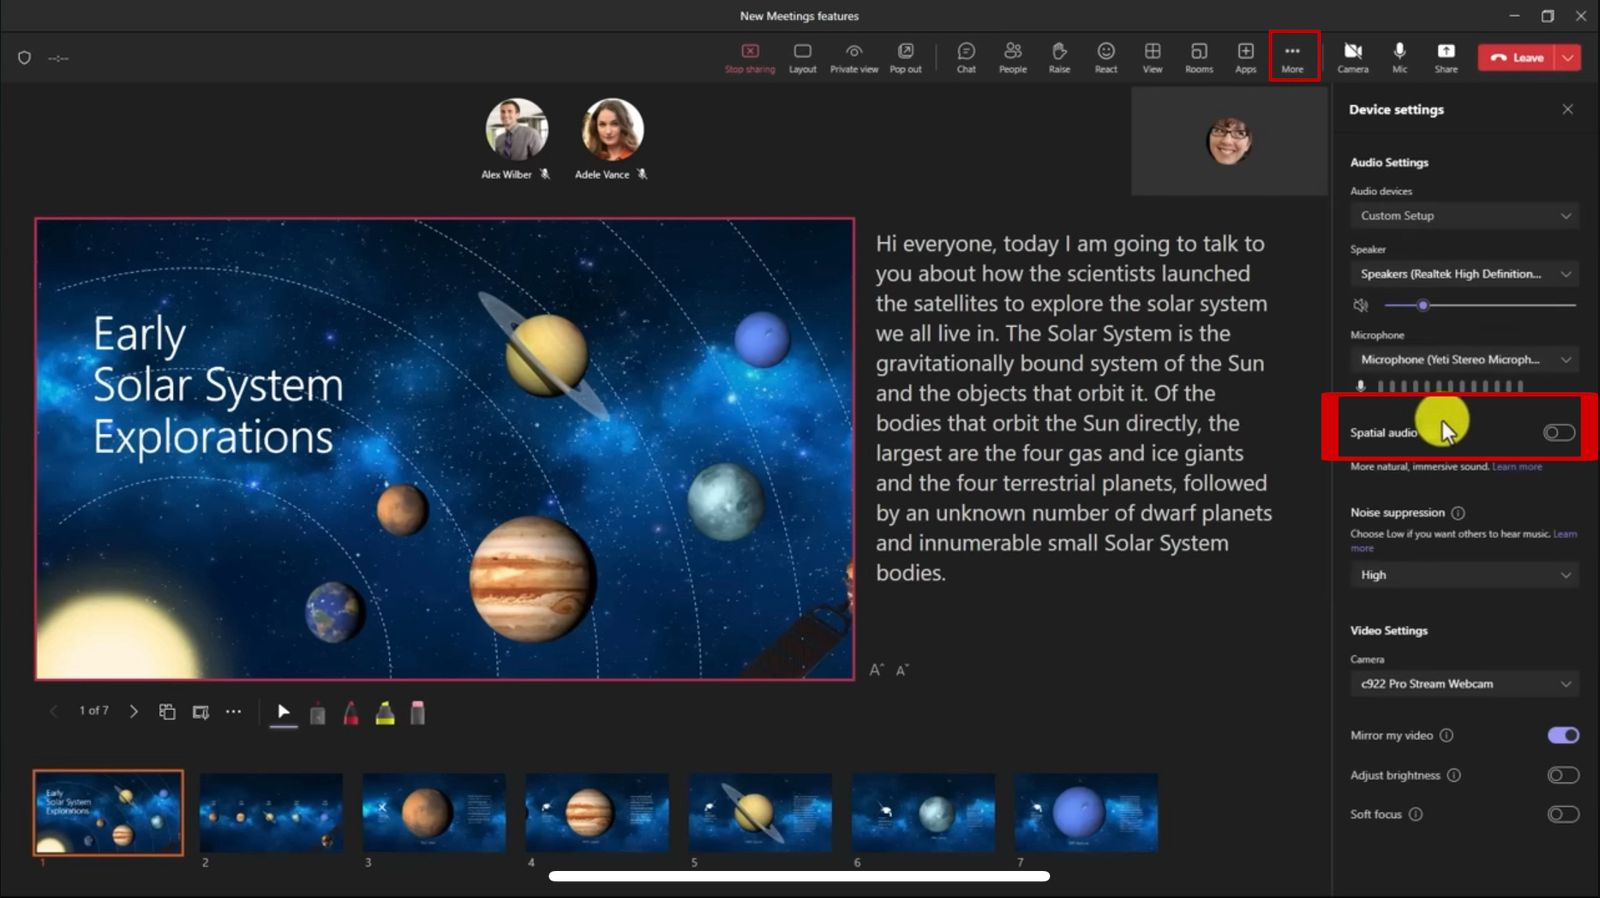
4. Microsoft Teams introduces a groundbreaking feature that elevates your meeting audio experience – Spatial Audio. This innovative Teams meeting feature analyzes the placement of participants in the gallery view and adjusts the audio to create a more spatially accurate and immersive sound experience. Whether someone is on the left, center, or right of the screen, the audio will reflect their virtual position. Note that, Spatial Audio works seamlessly with USB wired headphones and stereo speakers. It enhances the auditory experience by making it sound more realistic and spatially accurate. However, Spatial Audio is not supported in Bluetooth wireless devices an d Microsoft plans to introduce support for wireless headphones in the future. Here’s how you can enable and experience Spatial Audio in your Teams meetings:
- To enable Spatial Audio, go to the three-dot menu, select “Settings,” and then navigate to “Device Settings.” You’ll find a switch for Spatial Audio – turn it on to enjoy the immersive sound experience.
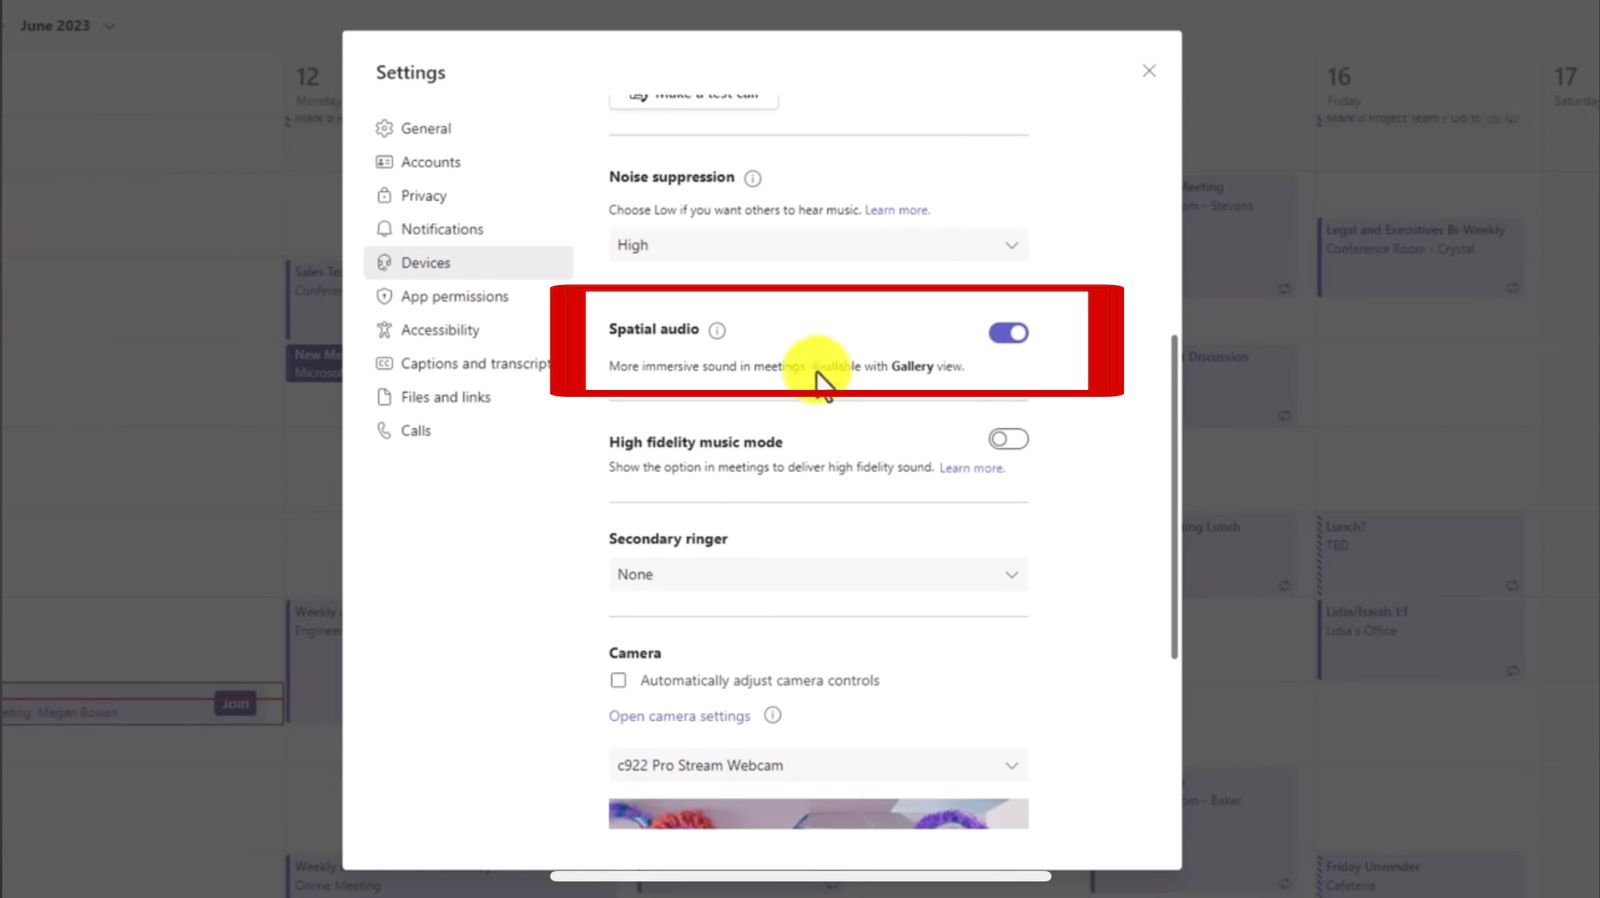
- Permanent Activation: For a consistent experience, you can also permanently activate Spatial Audio in your main Teams app settings. Simply go to the three-dot menu, choose “Settings,” then navigate to “Devices,” and turn on the Spatial Audio switch.
Immerse yourself in a more realistic and engaging meeting environment with Spatial Audio. This new feature can be found in the “8 New features in Microsoft Teams for Summer 2023” YouTube video, starting at 6:55.
For further information on the updates, please visit this YouTube video.