Summer Session meetings via Microsoft Teams may require you to have camera and microphone input to properly participate in your class session. To ensure success you may need to test your Teams Settings and permissions prior to the start of your first class session.
Teams Meeting Settings
To adequately test the Teams meeting settings, you’ll want to identify if/which headphones and/or microphone you intend to use during class. While they are not required to participate in Teams meetings, it is recommended that you utilize headphones for meeting audio. If you are using a laptop it should come equipped with a microphone and camera built in if you are not using external microphones or cameras.
Install Microsoft Teams
- Mac:
- From https://teams.microsoft.com/downloads, click “Download” at the top of the page and the operating system specific version will Download. A PKG file will download
- Double click the PKG file.
- Follow the installation wizard to complete the installation.
- Teams will be installed to /Applications folder. It is a machine-wide installation
- Launch Teams and login with your Wooster Credentials.
- Windows
- From https://teams.microsoft.com/downloads, click “Download” at the top of the page and the operating system specific version will download. An executable file (.exe) file will download
- Click “Save file” to download the file.
- Open your Downloads folder and double click the “Teams_Windows_x64” file.
- Launch Teams and login with your Wooster Credentials.
Set your Devices
Be sure to have your headphones, and any external microphones or cameras you intend to use plugged in or paired to your computer at this time

- In the top right of your Teams application, next to your profile photo, click the three dots for more options
- Click Settings in the drop down menu
- In the left-side settings menu, select “Devices”
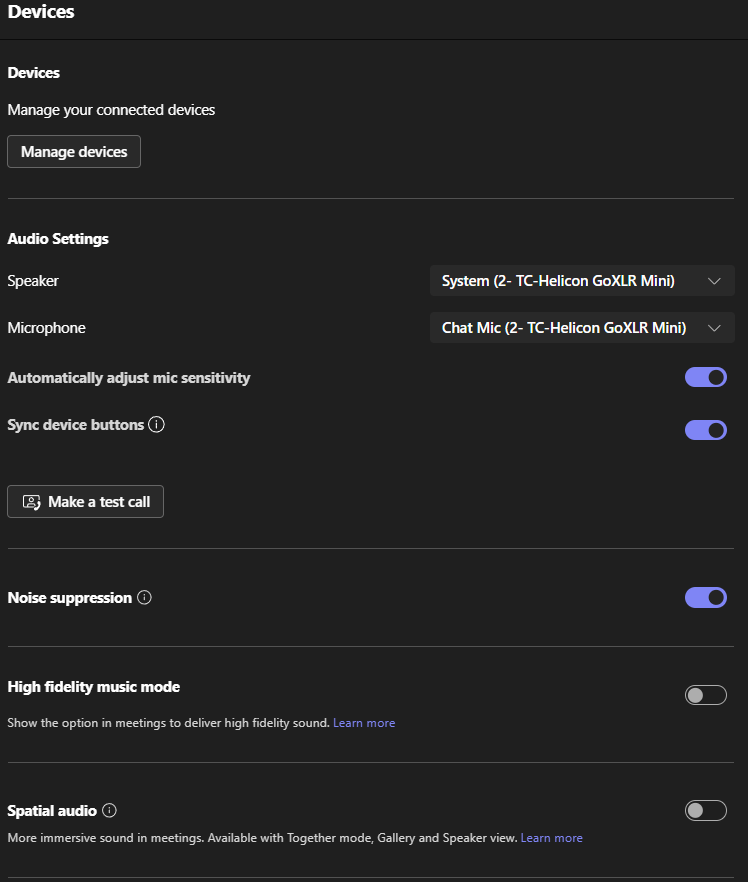
Audio Settings

- Select the Speaker you want the meeting audio to play from. We recommend you use heaphones for meeting audio. You may need to click on the drop down menu to select the correct heaphones/speakers
- Select the preferred microphone. You may not need to change this setting if you are using the computer’s default, built-in microphone
- We recommend you allow teams to automatically adjust mic sensitivity and keep Noise suppression on
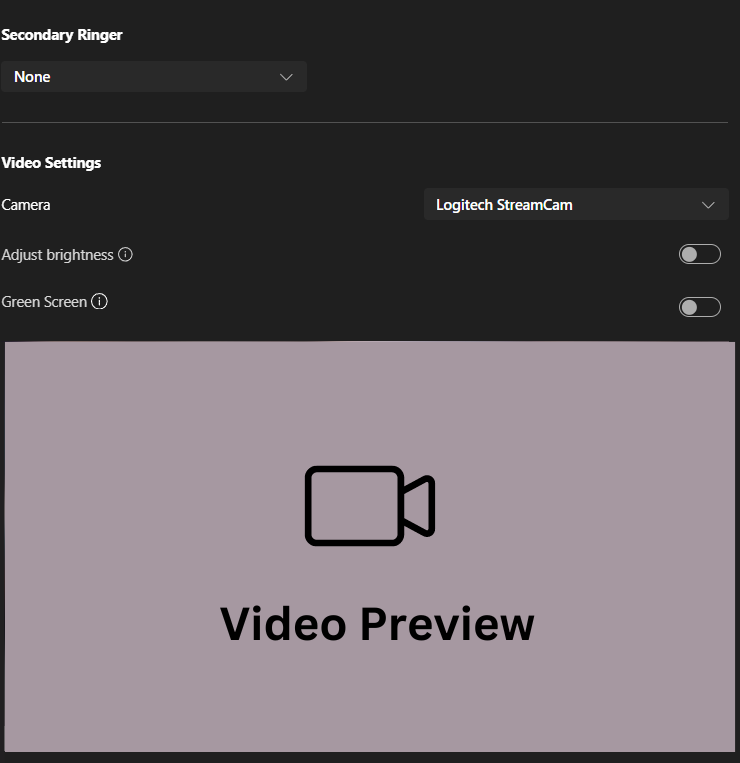
Video Settings

- Select the Camera you would like to use for your Teams Meetings. Generally, if you are not using an external web cam or additional camera, it will default to your laptop’s built-in camera
- You can test the brightness, but generally you should not have to adjust these settings unless you are in an unusually bright location
- You can change background filters and more before entering, or once you have entered your Teams Meeting.
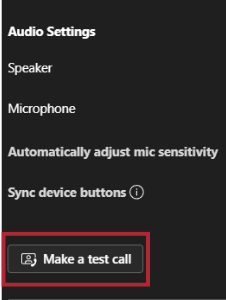
Make a Test Call

Navigate back to Audio Settings, and select Make a Test call. You will be entered into a call with “Echo” and can speak and have your audio played back to you. Your video will be available to you to see as it would be presented within the Teams Meeting.
Permissions Troubleshooting
In some cases you will find that your microphone and video are still not connecting. This may be because of your computer’s permissions settings.
MacOS
- Open System Preferences on your device
- Select Security and Privacy
- Select Microphone or Camera
- Under Privacy, make sure Microsoft Teams is selected
- Close all apps and restart your device
Windows
- Open your device settings and select Privacy and Security
- Under App Permissions, select Microphone or Camera
- Turn on the Microphone or Camera toggle
- Turn on the Microsoft Teams (work or school) toggle
- Turn on the Let Desktop apps access your microphone or Camera Toggle (Note: if these toggles were already turned on, try turning them off and on again to make sure the settings apply
- Close all apps and restart your device
If you are still experiencing issues, or would like to troubleshoot other issues within Microsoft Teams Meetings, visit the Microsoft Troubleshooting pages for Teams, or contact the Helpdesk M-F 8:30a-5:00p via email or call at 330-287-4357
